

This post is part of the series 30 Days of Web Development.
In this series, we start from the basics and walk through everything you need to know to get started with Web Development.

To get more comfortable with Selector Specificity, let's revisit our "css-practice.html" document.
This post is part of the series 30 Days of Web Development.
In this series, we start from the basics and walk through everything you need to know to get started with Web Development.
To get more comfortable with Selector Specificity, let's revisit our "css-practice.html" document.
I've gone ahead and added a couple more elements, some that now have class names and one with an Id. I've also modified the Internal stylesheet so that we have an "Uncomment sections" as we did in Day 8 when we played with HTML.
Open in your text editor and browser the updated HTML file that I am now calling: css-selector-practice.
Like on Day 8, in our HTML uncomment practice, we will be uncommenting the CSS sections one by one.
Go ahead and uncomment #1 via your text editor. Save the changes and refresh the browser window.
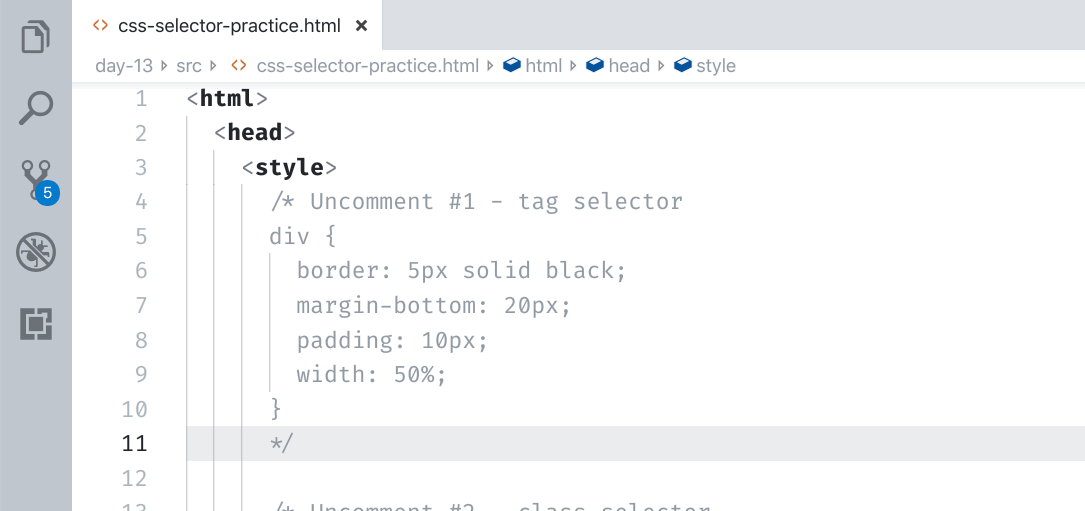
This first example ( Uncomment #1), is using Tag selectors. Specifically, it is targeting all div tags. We haven't used <div></div> elements yet, but they are very helpful in organizing HTML. In short, <div></div> elements define a section of HTMLdiv.
In this example, after uncommenting the snippet, you can see that we use a CSS Tag selector to add a black border around all the div tags.
OK, with your prediction made, go ahead an uncomment #2, save your changes, and refresh the browser window.
You should see something like the following:
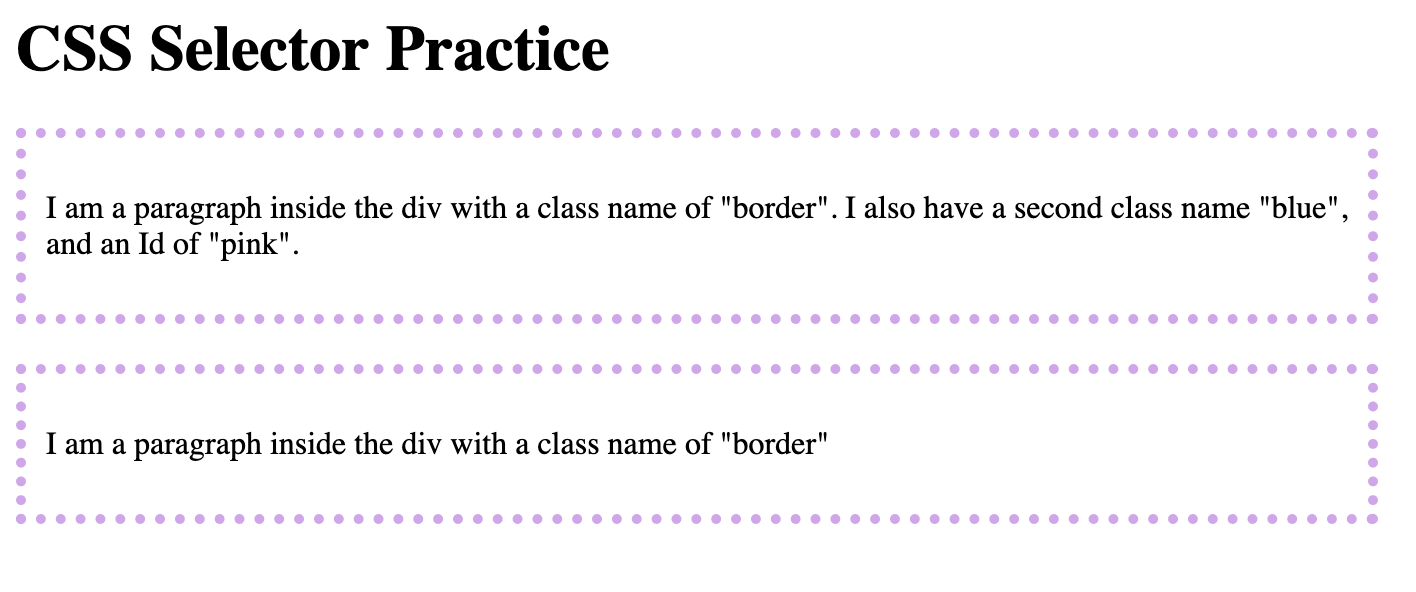
Because the Class selector is more specific than the Tag selector, the dotted pink'ish border is what is applied.
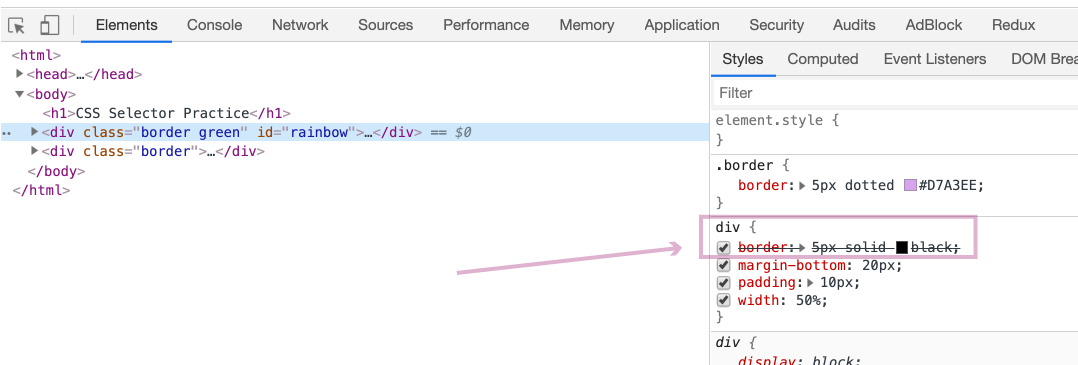
If you open the DevTools, you can see the black border CSS is crossed out, indicating that a more specific selector has overridden it.
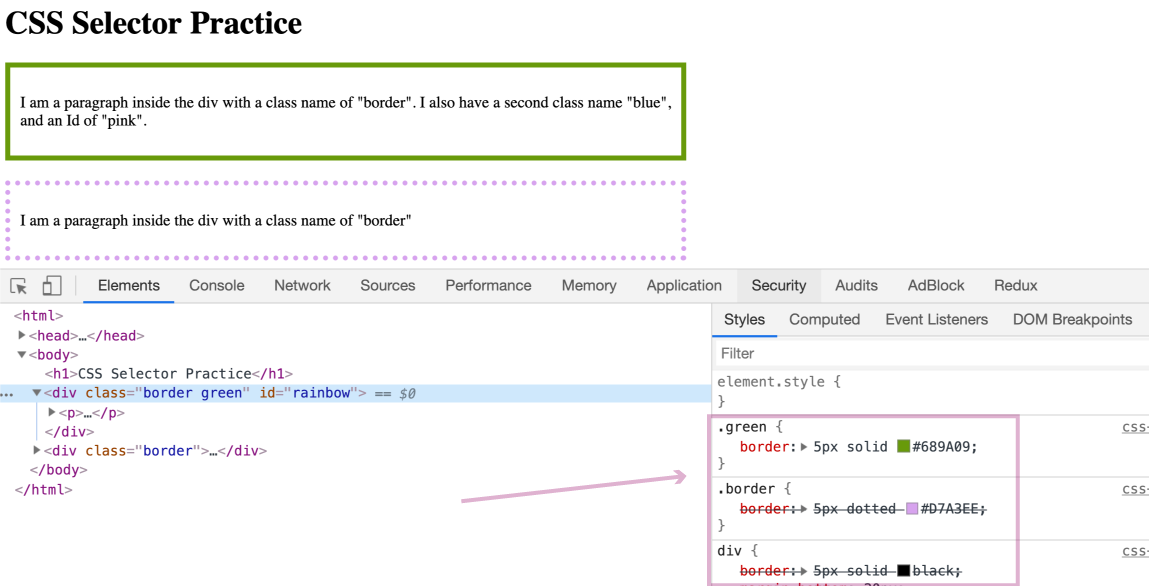
After uncommenting, saving your changes, and refreshing you'll see that only the first div has the green border, where the second has kept the pink dotted border. The use of multiple class names has made the green border more specific than just the one, and thus the green border trumps the pink.
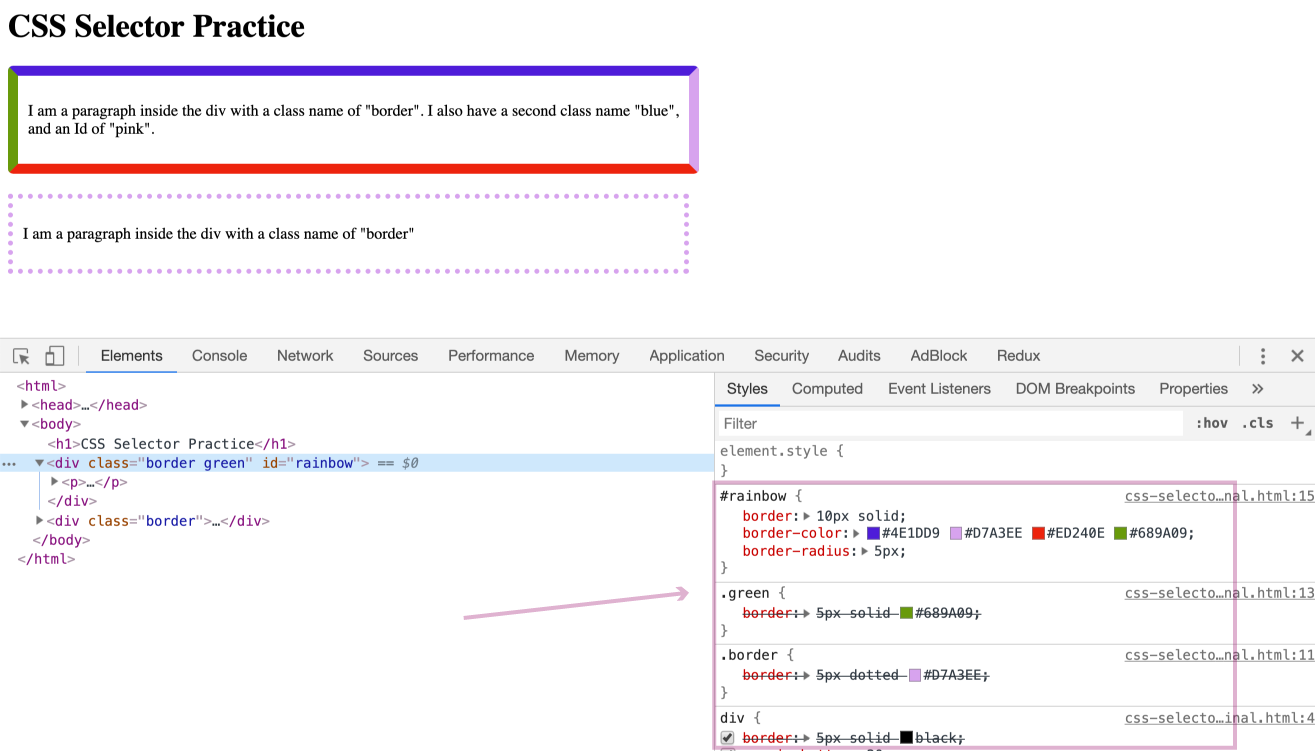
Well, that's fun, I mean, who doesn't like rainbows 🌈?
The key here is that Ids trump them all, but Ids can only be used once.
You can find a final version of the "css-selector-practice.html" document here, without any of the comments.
That's it for today. Hopefully, you have a better understanding of how CSS selectors affect how the browser determines what CSS to apply. If you'd like to learn more, I recommend one of my favorite go-to CSS websites, "CSS-Tricks." They have a solid article on Selector Specificity that augments much of what I've discussed here.
Tomorrow, we'll wrap up our CSS discussion by looking at CSS units. If you've been wondering what the px means when I write something like padding: 50px, your confusion will be assuaged in tomorrow's post.
The entire source code for this tutorial series can be found in the GitHub repo, which includes all the styles and code samples.
If at any point you feel stuck, have further questions, feel free to reach out to us by:

