This lesson preview is part of the n8n Automation: Building AI-Powered Workflows course and can be unlocked immediately with a \newline Pro subscription or a single-time purchase. Already have access to this course? Log in here.
Get unlimited access to n8n Automation: Building AI-Powered Workflows, plus 90+ \newline books, guides and courses with the \newline Pro subscription.
[00:00 - 00:06] Without further ado, I guess what we are going to do next, we are going to create our first node. And which node it will be?
[00:07 - 00:11] A bit trigger node. Right, so let's click on add node.
[00:12 - 00:15] There are multiple trigger nodes. I really like the variety.
[00:16 - 00:22] You can export on your own depending of all your needs. In our case, we're going to use the on chat node.
[00:23 - 00:34] Here there are settings, so when you're creating any new node, there will be different settings. In our case, we don't really need to change here anything.
[00:35 - 00:43] We will change other nodes in other settings as we will be building here. Right now we can see that make chat publicly available.
[00:44 - 00:58] We don't really need this as well. So all once you created a node and you, for example, understand that you don't need to update anything, which you just can click back to canvas or just outside click on gray area outside of the window.
[00:59 - 01:05] Moon, we got back and we can see our first node created. Awesome, congratulations.
[01:06 - 01:09] We can actually click right now on the chat. Why not?
[01:10 - 01:14] Let's click open shot. Let's write something here.
[01:15 - 01:23] Send and node executed successfully, but nothing happened because this node is not connected to anything right now. Correct.
[01:24 - 01:36] So what we need to do next is actually to add the action node to it. And in our case, since we're building a, it's not going to be just action node.
[01:37 - 01:47] This is going to be a I action node. There are two ways to do is you can click on the, for example, plus button here next to the trigger node, or you can click on that blood button.
[01:48 - 01:56] It's doing the same work for you. Here it will be just automatically connected to the neighboring node.
[01:57 - 02:04] And if you click here, it might be not, when the not always automatically connected. Let's just, for example, let's click here.
[02:05 - 02:19] There are multiple different nodes, which we can add after creating action node . Really a low variety here in our case, we're going to use a I notes and really soon we are going to talk about the action in app as well.
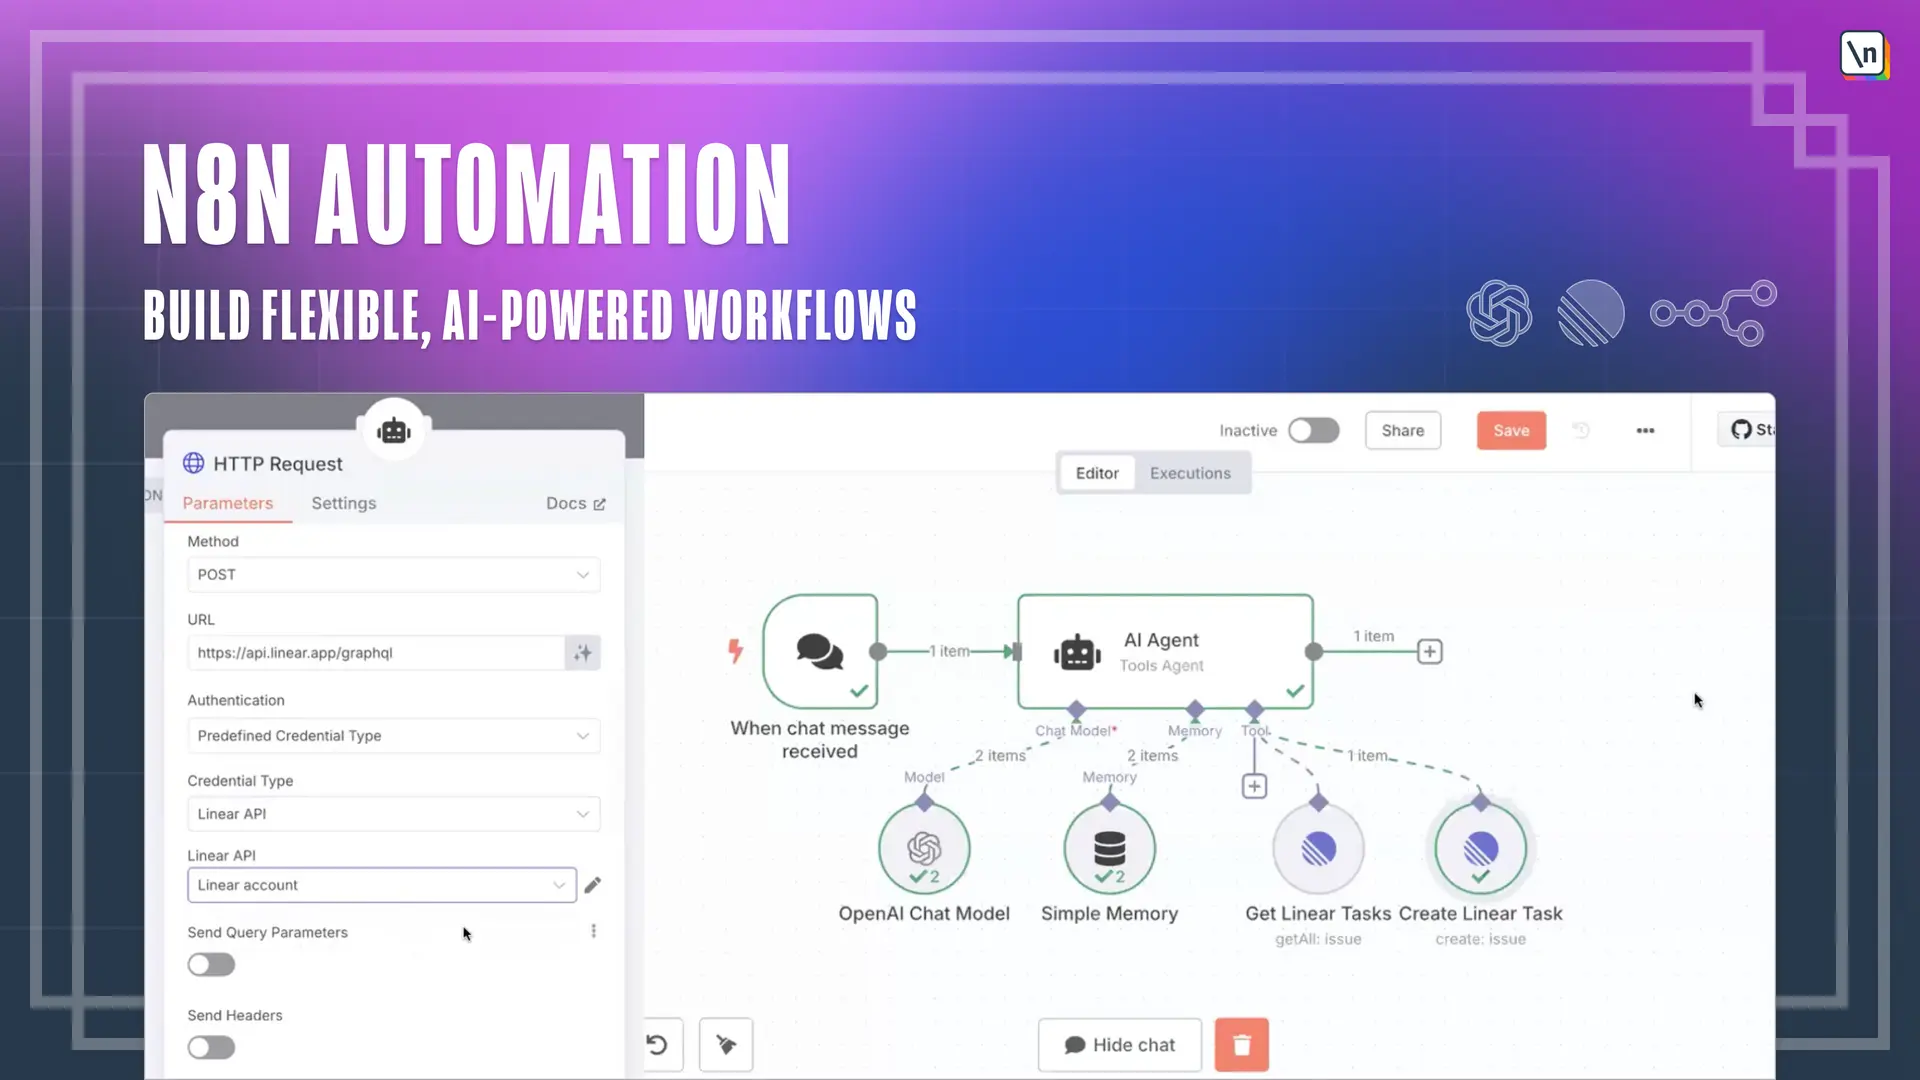
[02:20 - 02:26] But let's start from the AI. From the old AI notes and features, we're going to use a I agent.
[02:27 - 02:34] But if you're like interesting, interested about other animals, yeah, go ahead and explore it. Once again, there's so many possibilities with anything.
[02:35 - 02:41] But for now, we are going to stick with a I agents. Boom, let's click on it. There are some settings.
[02:42 - 02:51] Honestly, we don't really need to change anything here, but a couple of things that I want to point out. First of all, there's input and output.
[02:52 - 03:02] So for majority of action nodes, you actually can see what was in and what was out. So we can control the flow of data, which is super cool.
[03:03 - 03:10] And at the bottom, we can see the chat model, memory and tool. Let's close it for now, since we don't really need to change any settings.
[03:11 - 03:14] And here it is. A agent node.
[03:15 - 03:22] Here's chat model memory and tool. But right now you can see just floating around, right, how to connect it to the trigger.
[03:23 - 03:38] If you click this button and it's not connected automatically, you can just hover over the plus again and drug. It's and you can see the arrow is appearing and you can actually drug this arrow to the hour.
[03:39 - 03:44] A agent node and boop. It automatically like a magnet sticks in.
[03:45 - 03:48] Awesome. Let's move our agent a little bit closer.
[03:49 - 03:52] Right now they're connected. Let's try to write something again.
[03:53 - 03:56] Why not? And problem with the agent.
[03:57 - 03:59] Why? Because we're sending triggering our.
[04:00 - 04:10] Chat, but this chat goes to the empty agent shell, which basically has nothing inside here and it just like empty work. Right.
[04:11 - 04:14] So guess what we're going to attach next. Right.
[04:15 - 04:20] We're going to attach chat model to give it some brain. Let's click on chat model.
[04:21 - 04:23] There are multiple. Chat models to choose from.
[04:24 - 04:30] In our case, let's choose open AI. Good last thing here.
[04:31 - 04:39] We already need to take care about setting some of the parameters. First one is credential to connect with.
[04:40 - 04:50] So basically you're providing your open AI API key here. And if you don't have any API key, you will be prompted to actually create new key.
[04:51 - 05:03] In my case, I already have open AI account key added as you have seen before previously. So I'm just going to click on open AI account and that's it.
[05:04 - 05:12] Next, we're choosing the model that we're going to work with. Once you connected your API key, you can choose like from the large variety of different models.
[05:13 - 05:25] In our case, we're going to work with the GPT for all mini. Since it's pretty capable for its price and what's one of the cheapest model to especially really good to play around with.
[05:26 - 05:31] That's it. We can just click outside again and boom.
[05:32 - 05:35] Here's the our model. Everything is draggable.
[05:36 - 05:41] So you can see I can drag and drop it to whatever you want. Let's leave it really close to our agents.
[05:42 - 05:50] And by now, since we already have LOM attached, let's test doubt. Let's say hi.
[05:51 - 05:57] And magic is happening. And you can see visually, first of all, which is important, what is going on.
[05:58 - 06:03] And you can see that we got the response. So it is working, which is great.
[06:04 - 06:09] Our first step is done. Else I want to point out that we have the latest logs.
[06:10 - 06:22] Here it is. This is where you can visually see the flow of data and flow the executed nodes , which is really cool for debugging or understanding what exactly is going on.
[06:23 - 06:30] Right now, here's not that much because we're just prompting LOM and getting back the results. So it's just open AI chat model here and that's it.
[06:31 - 06:37] But it's going to go really soon. Okay, we have our model.
[06:38 - 06:40] Let's test it a little bit. Before testing, let's clear our chat.
[06:41 - 06:49] To clear a chat, just click this refresh button and it's going to delete everything. It's going to refresh everything, which is super.
[06:50 - 06:57] We can start from the scratch. Let's ask something like, what's one plus one?
[06:58 - 07:04] For example, I'm not sure just in case want to ask LOM. Okay, one plus one equals two.
[07:05 - 07:08] This is good beginning. Then let's ask something more complicated.
[07:09 - 07:23] Let's ask and plus one even more and let's send it. And we can see that inside of the outputs, the LOM is a little bit confused because it doesn't really understand what we want.
[07:24 - 07:37] Why this is happening because right now we don't have any memory about what is going on. So every message that we're sending, it is basically completely new message.
[07:38 - 07:44] It doesn't really know about the history or previous interactions. How we're going to solve this?
[07:45 - 07:54] You guessed right if you thought about the memory. So next we're going to click on the memory and see what exactly we have to choose from.
[07:55 - 08:15] Here we have used multiple different memories, but in our case, we're going to use build in simple memory, which is really neat because it just memory that leaves on your PC and you don 't really need to set anything up. It's just provided by default for you and easy to use.
[08:16 - 08:21] Just can click on it. There is just one parameter to take care of.
[08:22 - 08:29] So we can skip the session ID session key. We don't really need this, but we need to take a look at the context window links.
[08:30 - 08:41] This is the amount of the previous messages, which are going to be saved to our memory. Okay, so if you want to have more messages, more context, increase it.
[08:42 - 08:57] If you want to last decrease it, let's leave it five really good for testing, but take care of this parameter whenever you're working with this simple memory . How a simple memory work does not really create any vector database locally.
[08:58 - 09:06] It just saves everything like bunch of messages, just like a text. And then we are providing these messages and text as the context when we chat with the LLM.
[09:07 - 09:14] At least it used to be like that before. Maybe anything recently updated something, but that was the case previously.
[09:15 - 09:20] We have a lot of model. We have simple memory.
[09:21 - 09:25] Great. Let's check if it's work and remember something.
[09:26 - 09:34] Let's once again, once again, ask one not equal plus one. What it will be.
[09:35 - 09:45] Okay, it's two and plus one. Okay.
[09:46 - 09:53] And right now we can finally see that it has memory and it gives us without three, which is correct. Awesome.
[09:54 - 09:56] We have the memory. We have the model.
[09:57 - 10:02] We have all the basic chat model set it up and created. Let's move forward.