How to Create a React Native Login Screen
Creating the login screen
This lesson preview is part of the Creating a React Native Login course and can be unlocked immediately with a \newline Pro subscription or a single-time purchase. Already have access to this course? Log in here.
Get unlimited access to Creating a React Native Login, plus 90+ \newline books, guides and courses with the \newline Pro subscription.
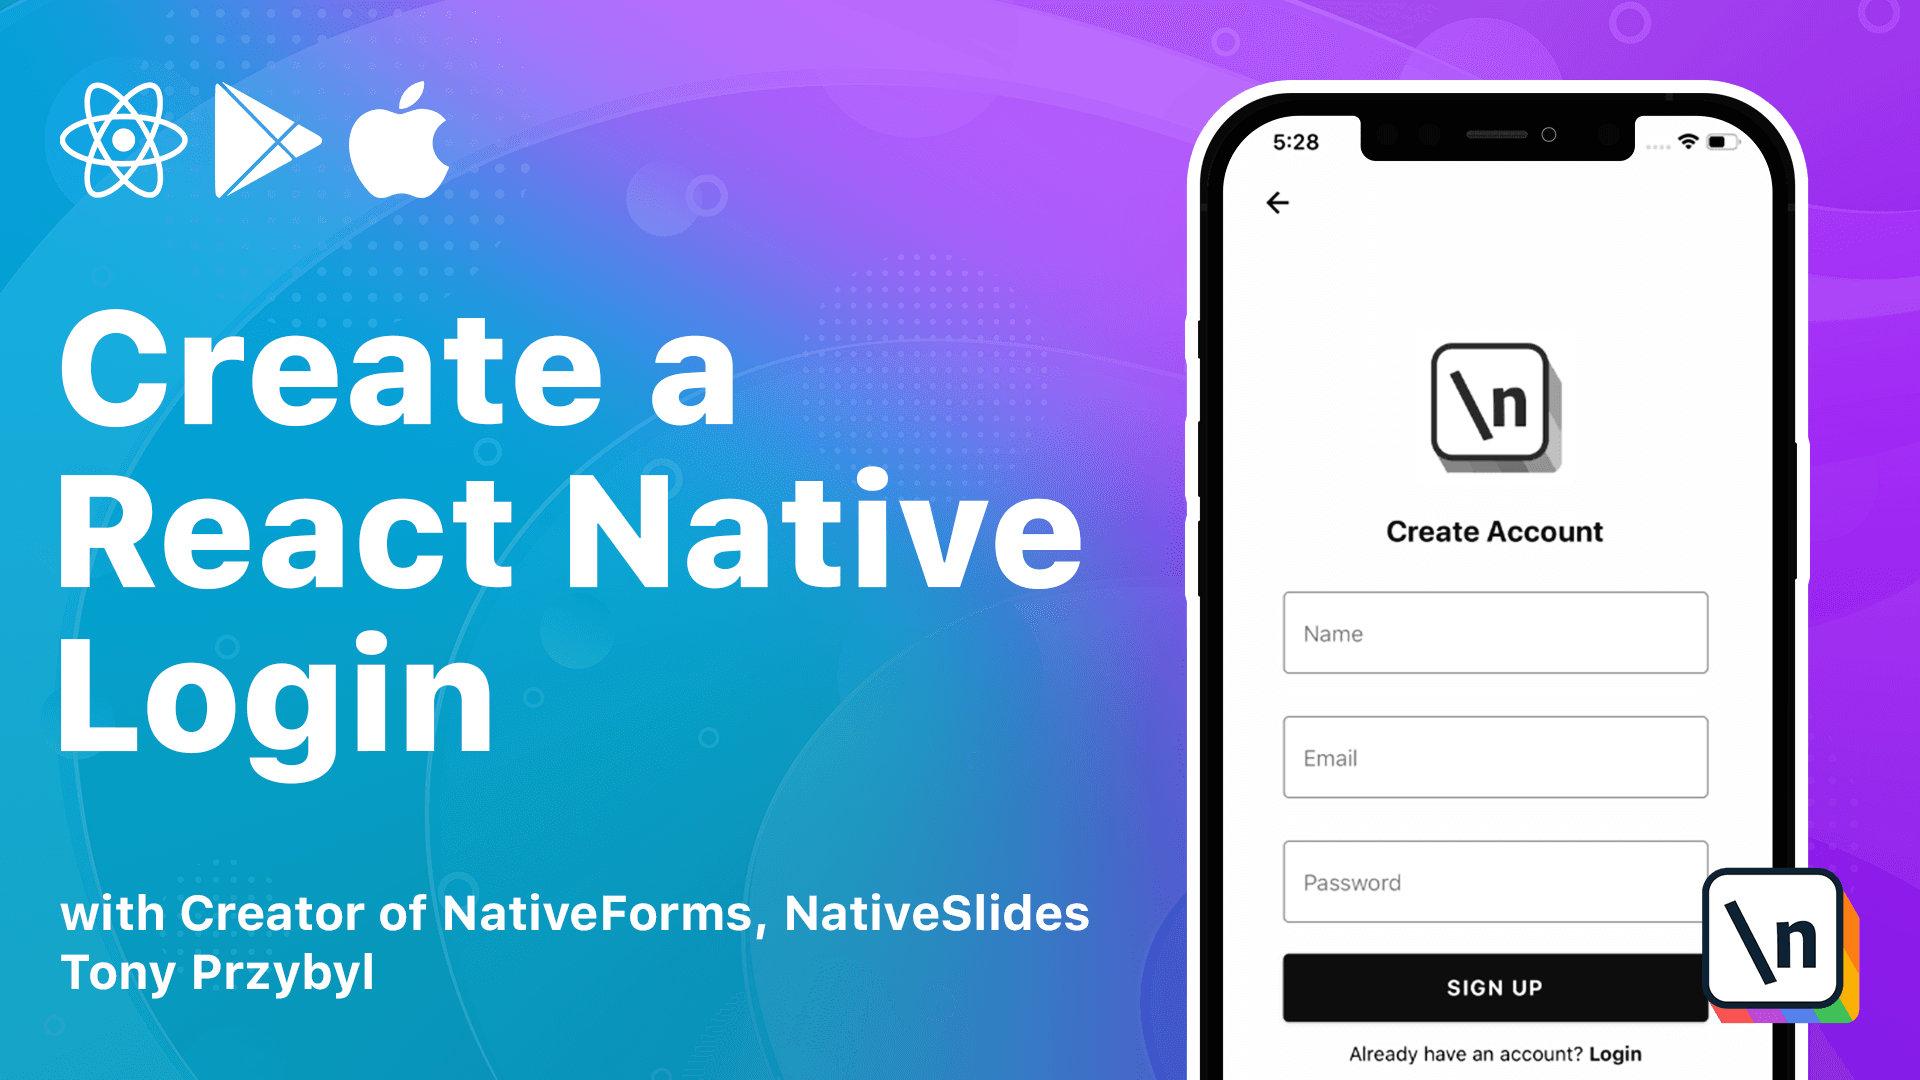
[00:00 - 00:07] In this lesson, we are going to add the login screen to our app. This screen contains two inputs and the submit button.
[00:08 - 00:25] We start by creating a login screen.js file and copying the content from the screen that we already have. We change the text in header and remove the paragraph component completely since we don't need it here.
[00:26 - 00:34] We can leave the login button but we need to change its mode to contained. So it will act as a primary button.
[00:35 - 00:46] We need to export our screen in index.js file to use it in our stack. Remember to change the name prop to node run into any errors while running the app.
[00:47 - 00:58] After this is done, we can run our app. Our current screen is start screen created in the previous lesson.
[00:59 - 01:06] Right now, the login button does nothing because we didn't add the own press method to it. Let's fix that.
[01:07 - 01:16] As I mentioned in the lesson dedicated to React Navigation, each screen is provided with the prop called navigation. We can use it to navigate to login screen.
[01:17 - 01:26] Now, let's add inputs to our screen. Luckily for us, we already created the text input component that we can use.
[01:27 - 01:34] We can use the text input component to use the text. Let's import our component and add it below our header.
[01:35 - 01:41] We give it a label prop and set it to email. Our input is rendered on the screen.
[01:42 - 01:48] Perfect. Currently, our input is uncontrolled, meaning we don't control the value of it.
[01:49 - 02:01] To change that, we need two props, value and unchange text. After we add them, we can see that even when typing, the value in text input doesn't change, because we set the value to always be test.
[02:02 - 02:10] It's not super useful to have inputs like this. That's why we use the unchange text prop to update our input when the user types.
[02:11 - 02:21] My approach for that is to use a hook provided by React called user input. We give it an object with value and error properties.
[02:22 - 02:29] We will use the error prop for field validation later. Now, let's pass those properties to our input.
[02:30 - 02:40] The last thing we need to implement is the unchange text method and it's really straightforward. As the first argument, we receive text entered by the user.
[02:41 - 02:50] We need to update our state with it. In our app, we can see that we are in full control over our input.
[02:51 - 02:59] This is how you change uncontrolled input to controlled input. The second input that we need to add is password.
[03:00 - 03:14] We copy our email input and change the properties inside it. Let's define our state that will be used for this input.
[03:15 - 03:26] We also add secure text entry prop so the password will not be visible when the user enters it. Excellent, our screen is almost ready.
[03:27 - 03:33] Let's take care of the submit action. Right now clicking the login button does nothing.
[03:34 - 03:48] We can define the on login pressed method and pass it to our button. Before calling any authorization methods, we need to validate our email and password inputs.
[03:49 - 03:55] Let's start with email. Email error variable will tell us if there is something wrong with our input or not.
[03:56 - 04:06] If the value doesn't exist, we want to display an error message. Right now if we click on the login button, we can see that our email input turned red.
[04:07 - 04:21] It doesn't display any error message because we need to pass error text prop. One thing worth implementing right away when dealing with email is simple email address validation.
[04:22 - 04:35] Currently, users can enter any text and proceed. For the purpose of this course, I created a simple email validator function that will tell us if an input is valid email format or not.
[04:36 - 04:45] Let's use it. Right now only valid email addresses will be accepted.
[04:46 - 04:54] We need to repeat the whole process for password input. I have created a custom validation function for that too.
[04:55 - 05:12] Perfect. All inputs are now validated before submitting.
[05:13 - 05:18] Right now we don't make any calls to Firebase. That's why nothing is happening.
[05:19 - 05:26] We will take care of that in the next lessons. One last thing I would like to do in this lesson is to add a bug button to our screen.
[05:27 - 05:40] Currently, users can go back using a finger gesture or the phone's bug button, but for some users it might not be obvious. For the purpose of this course, I created a bug button component.
[05:41 - 05:50] It is a simple button that takes on-back action and sticks to the top left side of the screen. We are missing one dependency here.
[05:51 - 06:03] We use the "get status bar height" method to display our button in place that will be visible to our users, just below the status bar. We can install it by running the command.
[06:04 - 06:15] After this is done, we can import our component and add it to the screen. We use the "go bug" method from our navigation.
[06:16 - 06:27] Great, users can easily navigate between screens now. To sum up, in this lesson we created a login screen that has two inputs and a submit action.
[06:28 - 06:38] We implemented input validation and added a bug button to our screen. In the next lesson we are going to create, register and restore password screens.
[06:39 - 06:41] Thank you and see you in the next lesson.