
Getting Started with React Native
Weather App
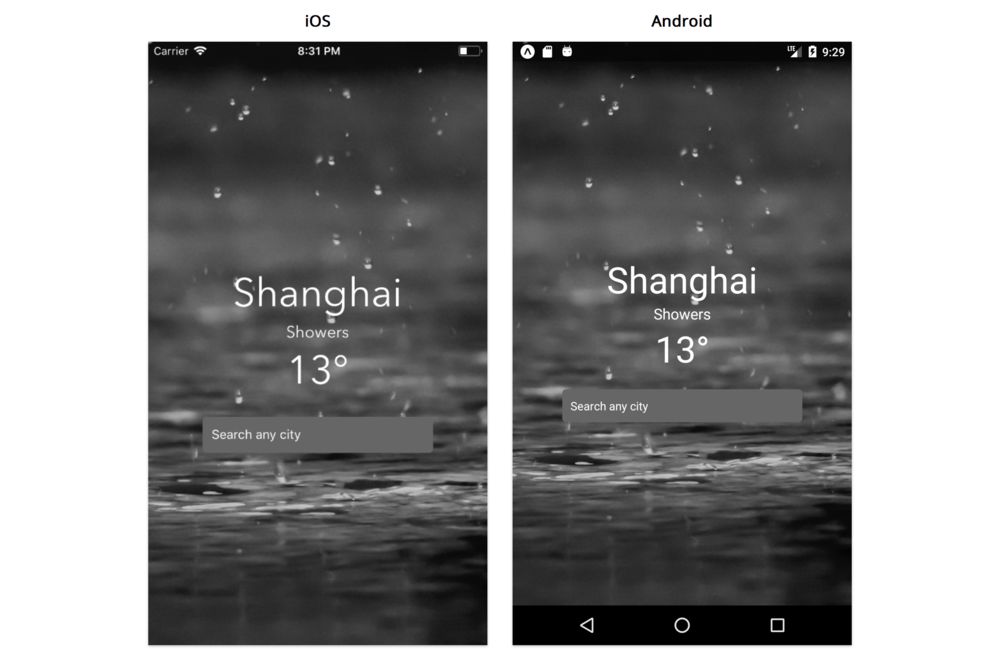
In this chapter we’re going to build a weather application that allows the user to search for any city and view its current forecast.
With this simple app we’ll cover some essentials of React Native including:
- Using core and custom components
- Passing data between components
- Handling component state
- Handling user input
- Applying styles to components
- Fetching data from a remote API
By the time we're finished with this chapter, you'll know how to get started by building a basic application with local state management. You’ll have the foundation you need to build a wide variety of your own React Native apps.
Here’s a screenshot of what our app will look like when it’s done:
In this chapter, we'll build an entire React Native application from scratch. We'll talk about how to set up our development environment and how to initialize a new React Native application. We'll also learn how Expo allows us to rapidly prototype and preview our application on our mobile device. After covering some of the basics of React Native, we'll explore how we compose apps using components. Components are a powerful paradigm for organizing views and managing dynamic data.
We're about to touch on a wide variety of topics, like styling and data management. This chapter will exhibit how all these topics fit together at a high-level. In subsequent chapters, we'll dive deep into the concepts that we touch on here.
Code examples
This book is example-driven. Each chapter is set up as a hands-on tutorial.
We'll be building apps from the ground up. Included with this book is a download that contains completed versions of each app as well as each of the versions we develop along the way (the "sample code.") If you're following along, we recommend you use the sample code for copying and pasting longer examples or debugging unexpected errors. If you're not following along, you can refer to the sample code for more context around a given code example.
The structure of the sample code for all the chapters in this book follows this pattern:
├── components/
├── App.js
├── 1/
│   ├── components/
│   └── App.js
├── 2/
│   ├── components/
│   └── App.js
├── 3/
│   ├── components/
│   └── App.js
// ...
At the top-level of the directory is App.js and components/. This is the code for the completed version of the application. Inside the numbered folders (1/, 2/, 3/) are the different versions of the app as we build it up throughout the chapter.
Here's what a code example in this book looks like:
  render() {
    return (
      <View style={styles.container}>
        <Text>Open up App.js to start working on your app!</Text>
      </View>
    );
  }
Note that the title of the code block contains the path within the sample code where you can find this example (weather/1/App.js).
JavaScript
This book assumes some JavaScript knowledge.
React Native uses Babel as a JavaScript compiler to allow us to develop in the latest version of JavaScript, regardless of what version the underlying platform supports. To understand what we mean by JavaScript versions, you can refer to the Appendix.
We highlight some of JavaScript's newer features in the Appendix. We reference the appendix when relevant.
Starting the project
yarn
We can install all the required tools to begin our project by using yarn. yarn is a JavaScript package manager -- it automates the process of managing all the required dependencies from npm, an online repository of published JavaScript libraries and projects, in an application. This is done by defining all our dependencies in a single package.json file.
You can refer to the documentation for instructions to install yarn for your operating system. The documentation also explains how to install node as well. In order to use the Expo CLI however, Node.js v6 or later is required.
Here's a list of some commonly used yarn commands:
yarn initcreates apackage.jsonfile and adds it directly to our project.yarninstalls all the dependencies listed inpackage.jsoninto a localnode_modulesfolder.yarn add new-packagewill install a specific package to our project as well as include it as a dependency inpackage.json. Dependencies are packages needed when we run our code.yarn add new-package --devwill install a specific package to our project as well as include it as a development dependency inpackage.json. Development dependencies are packages needed only during the development workflow. They are not needed for running our application in production.yarn global add new-packagewill install the package globally, rather than locally to a specific project. This is useful when we need to use a command line tool anywhere on our machine.
If you're already familiar with
npmand have it installed, you may use it instead ofyarnand run its equivalent commands. These tools both manage dependencies specified in apackage.jsonfile. However, we find thatyarnresults in signficantly more consistent builds when working with React Native, so we recommend usingyarn.
Watchman
Watchman is a file watching service that watches files and triggers actions when they are modified. If you use macOS as your operating system, the Expo and React Native documentation recommend installing Watchman for better performance. The instructions to install the service can be found here.
Expo
Expo is a platform that provides a number of different tools to build fully functional React Native applications without having to write native code. If you've used Create React App before, you'll notice similarities in that no build configuration is required to get up and running.
Building an application also does not require using Xcode for iOS, or Android Studio for Android. This means that developers can build native iOS applications without even owning a Mac computer. Using Expo is the easiest way to get started with React Native and is recommended in the React Native documentation.
Expo provides two local development tools that allow us to build, preview, share and publish React Native projects:
- Expo client app: A client iOS/Android mobile application for previewing projects.
- Expo CLI: A local development tool for building React Native projects with no build configuration. This is done through Create React Native App, which is merged directly with the CLI.
Including Native Code
The Expo CLI is not the only way to start a React Native application. If we need to start a project with the ability to include native code, we'll need to use the React Native CLI instead. With this however, our application will require Xcode and Android Studio for iOS and Android respectively.
Expo also provides a number of different APIs for device specific properties such as contacts, camera and video. However, if we need to include a native iOS or Android dependency that is not provided by Expo, we'll need to eject from the platform entirely. Ejecting an Expo application means we have full control of managing our native dependencies, but we would need to use the React Native CLI from that point on.
We'll explore how to use React Native CLI and add native modules to a project later on in this book.
Previewing with the Expo client
To develop and preview apps with Expo, we need to install its client iOS or Android app to develop and run React Native apps on our device.
Android
On your Android mobile device, install the Expo client on Google Play. You can then select Scan QR code and scan this QR code once you've installed the app:

If this QR code doesn't work, we recommend making sure you have the latest version of that Expo app installed, and that you're reading the latest edition of this book.
Instead of scanning the QR code, you can also type the project URL,
exp://exp.host/@fullstackio/weather, inside of Expo to load the application.
iOS
You can install the Expo client via the App Store. With an iOS device however, there is no capability to scan a QR code. This means we'll first need to build the final app in order to preview it. We can do this by navigating to the weather/ directory in the sample code folder and running the following commands:
cd weather
yarn
yarn start
This will start the React Native packager. Pressing e will allow you to send a link to your device by SMS or e-mail (you'll need to provide your mobile phone number or email address). Once done, clicking the link will open the application in the Expo client.
For the app to load on your physical device, you'll need to make sure that your phone is connected to the same local network as your computer.
Using a supported version
The Expo client app only supports the most recent 5 or 6 releases of Expo and React Native. This book uses Expo SDK 33 (React Native version 0.59). If you're reading this book more than 6 months after the release date, you may receive an error indicating the Expo version of your project is too old if you try to run your app in the Expo client. You can upgrade to the latest version of Expo and React Native by referring to the upgrade guide for your current version in the documentation.
Most of the time, updates don't cause significant API changes. However, if you purchased a digital copy of the book, we recommend you download an updated version of the book just in case.
Preparing the app with the CLI
At this point, you should see the final application load successfully on your device. Play around with the app for a few minutes to get a feel for it. Try searching for different cities as well a location that doesn't even exist.
If you plan on building the application as you read through the chapter, you'll need to create a brand new project. Once yarn is installed, let's run the following command to install the Expo CLI globally:
yarn global add [email protected]
The
@2.5.0specifies the version ofexpo-clito install. It's important to lock in version2.5.0so that the version on your machine matches that here in the book.
We'll call our application weather and can use the following command to get started:
expo init weather --template blank@sdk-33 --yarn
The CLI will take a few minutes to download and extract all the project files. We used the --template option to specify that we want the blank template built with Expo SDK 33. We used the --yarn option to use yarn instead of npm for installing dependencies. Navigate to the weather directory once that command is finished to boot the app:
cd weather
yarn start
Once the project has finished starting, you should see some information outputted to the console.
With the packager running, scanning the QR code with an Android device or sending a link directly to an iOS device using the e hotkey will allow you to preview the application. It is important to remember that a device needs to be connected to the same local network as the computer in order for this to work.
Secondly, a browser tab that renders Expo's Developer Tools should have also opened for you automatically.
With Expo DevTools, you can see outputted logs easier as well as perform a number of actions, such as sending an email link, directly through its interface instead of typing into the console if you prefer.
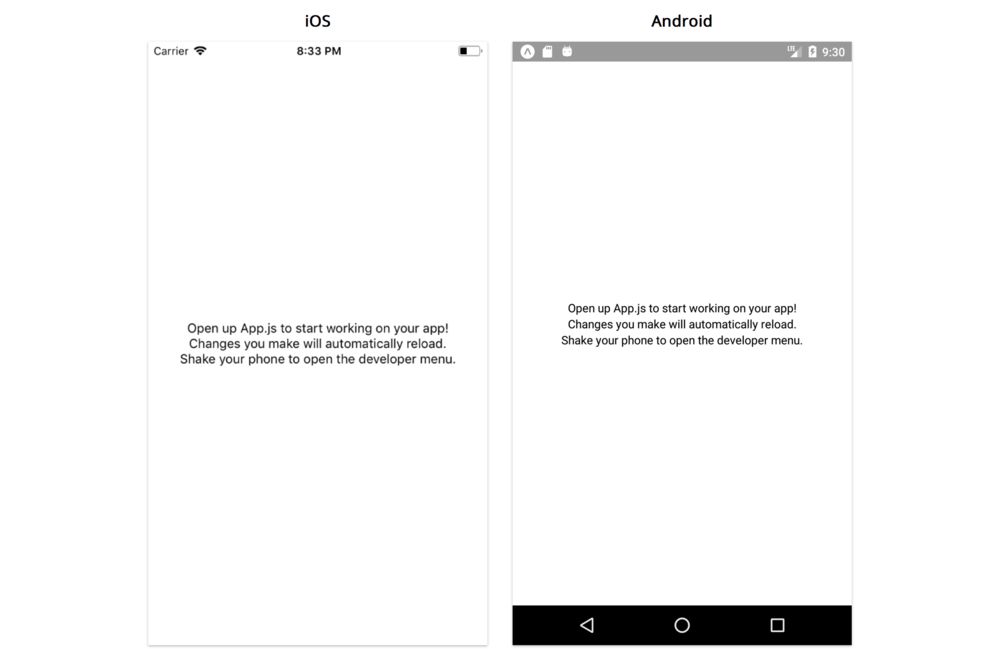
Open the application with your Android device by using the QR code or by sending a link to your iOS device. Once it finishes loading, we should see the starting point:
Running on a simulator
As we mentioned, using the Expo client app allows us to run our application without using native tooling (Xcode for iOS, or Android Studio for Android).
However if we happen to have the required build tools we can still run our application in a virtual device or simulator:
- With a Mac,
yarn run ioswill start the development server and run the application in an iOS simulator. We can also start the packager separately withyarn startand pressito open the simulator.- With the required Android tools,
yarn run androidwill start the application in an Android emulator. Similarly, pressingawhen the React Native packager is running will also boot up the emulator.Running an application using an emulator/simulator can be useful to test on different devices and screen sizes. It can also be quicker to update and test code changes on a virtual device. However, it's important to run your application on an actual device at some point in order to get a better idea of how exactly it looks and feels.
By default, the Expo CLI comes with live reload enabled. This means if you edit and save any file, the application on your mobile device will automatically reload. Moreover, any build errors and logs will be displayed directly in the terminal.
Let's see what the directory structure of our app looks like. Open up a new terminal window.
Navigate to this app:
cd weather
And then run ls -a to see all the contents of the directory:
ls -a
If you're using PowerShell or another non-Unix shell, you can just run
ls.
Although your output will look slightly different based on your operating system, you should see all the files in your directory listed:
├── .expo/
├── assets/
├── node_modules/
├── .gitignore
├── .watchmanconfig
├── App.js
├── app.json
├── babel.config.js
├── package.json
This page is a preview of Fullstack React Native: The Complete Guide to Building Beautiful React Native Apps
Get the rest of this chapter plus hundreds of pages of React instruction, 4 sample projects, a screencast, and more.
