


Redux is fantastic. It provides a single, global state container for JavaScript apps. The elegance of a single state tree manipulated by focused, straightforward functions is simple and powerful. But we've noticed that as some of our projects grow in size and complexity, our setup becomes increasingly complex. We've developed some helpers that make this process quick and easy.
In this post, we're looking at spots in code that are common places for error as well as looking at where there is unnecessary redundancy in our code to try to save ourselves from over-typing.
A default Redux setup has lots of opportunities for error. Before long, code to handle the state tree piles up into one gigantic switch statement, constant exports are littered everywhere (don't misspell one of them, yikes), and the ever-growing file structure becomes unwieldy.
Conventions, such as ducks-modular-redux, offer configuration around the madness and have become pretty popular as a method for grappling with these mental complexities.
While using Redux over the past year, we've built tooling that makes our redux implementations sane and easy to work with. We're open-sourcing this tooling. We call it redux-module-builder. While it shares a lot of goals with redux packages, such as ducks-modular-redux, it offers a collection of helpers to make the process easier, reduce boilerplate, and speed-up developer-time, where these other conventions don't help out.
In addition, some actions require us to communicate with a back-end server. This being a common requirement, redux-module-builder package has some built-in mechanisms for dealing with APIs.
TL;DR
If you're familiar with Redux, the best way to understand the benefits of setting up your store in a modular way with redux-module-builder is to take a look at some of the same redux module code.
The following snippet demonstrates all the logic around signing a user in and out of an example application. It's easy to understand exactly what is going on:
import {createConstants, createReducer} from 'redux-module-builder';
import {createApiAction, createApiHandler} from 'redux-module-builder/api';

/**
 * Create some custom constants
 **/
export const types = createConstants('currentUser')(
  {'SIGN_IN': { api: true }},
  'SIGNED_OUT'
);

/**
 * Create our actions, one action which defines an api
 * and one pure, non-api action
 **/
export const actions = {
  signIn: (email, password) => createApiAction(types.SIGN_IN)(
    (client, opts) => client.post({
      path: '/user/login',
      params: {email, password}
    })),
  userSignedOut: msg => ({type: types.SIGNED_OUT, payload: msg})
};

/**
 * Create a reducer to handle the SIGN_IN api action and one
 * non-api action
 **/
export const reducer = createReducer({
  ...createApiHandler(types.SIGN_IN)((state, {payload}) => {
    ...state,
    user: payload
  }),
  [types.SIGNED_OUT]: (state, {payload}) => ({
    ...state,
    user: null
  })
});

// Define the initial state for `currentUser` module
export const initialState = {
  user: null
};
Redux convention traditionally encourages separating your Redux app across a file structure like this:
app/
  constants.js
  reducers.js
  actionCreators.js
  ...etc
In the traditional Redux code structure, we're organizing our code by type, rather than by functionality. Using the Redux module pattern, on the other hand, we're organizing code around the management of a particular component of the state tree.
With all our actions/reducers/types pertaining to a single part of the state tree housed in a single, easy-to-follow file, the functionality of our code and our intentions are clear and concise.
Thinking in Redux
This post assumes familiarity with Redux. If you aren't familiar with Redux now, there are plenty of fantastic "getting started with Redux" tutorials out there that we list in the appendix of this post, so check that out for more details about the basics of Redux.
For a deep-dive into Redux, our book at fullstackreact.com details this process in vanilla Redux. Starting from installation through production-ready, it covers Redux for the beginner and the professional alike.
Let's take a minute to think about what Redux offers and how to think about using Redux in practice.
When building an app using Redux, we like to think of it as a system for managing the flow of data. When thinking about how to implement data at rest and data in transit (through our app), we'll break up our single state tree into small parts (branches) based upon their responsibilities within the app. For instance, when building a blog, we might have a state tree with three separate branches: authors, posts, and comments.
Mentally, when thinking about the data at rest in our system (by data at rest, we mean after we fetch data and we have "stored" it locally) it's easy to break it up into logical, functional pieces.
We can store posts in a posts list, the comments in a comment object, users in a user dictionary, and so forth. However, in transit this division of data is not as simple.
This data separation offers a pretty straightforward way to connect pieces of the state-tree to components that care about them and (more importantly) ignore those pieces they don't care about.
These issues grow in complexity when working in a big team. Where do you store the actions for fetching new posts?
Using Redux with React (or other view libraries), we'll bind these branches to different components and fire actions that describe what happened. In Redux, reducers determine how the state should be updated after an action is fired.
While actions and reducers have a direct relationship, there is no clear convention in Redux about how to "bundle" the two together. The community will typically put action constants in one file, action creators in another, and reducers in yet another. This adds mental overhead to tracing actions as they flow through the system.
We like to build our systems using a modular structure where we group like-functionality and data together. In this model, every part of the Redux pipeline that works with a discrete part of the state tree lives inside one file. Thanks to Redux, this is easy.
In addition, using redux modules can offer interesting opportunities to add extra functionality.
Introducing redux-modules
redux-module-builder offers an approach to bundling reducers, actions, and constants together in a module. This module centralizes the management of a part of the data model into a single, easy-to-follow file.
redux-module-builderis written in component pieces so as to reduce the amount of integration with the entire project library into tiny functional parts. Every API we talk about with the exception of the api actions/reducers can be used independently of the rest of the stack.Like one part, but not another? Use that one piece instead of the full stack. Like it all (like we do)? Use it all.
Let's get started using redux-module-builder to see how much it can improve and speed-up your redux workflow. redux-modules is available on npm as redux-module-builder. We can install it using npm in a project directory.
Once we have the redux-module-builder package installed, we will import different helpers from the package.
Let's skip right to the code before we even worry about setting it up (clone the example repo at https://github.com/fullstackreact/redux-module-builder-example to follow along).
A Twitter stream app
Let's walk through the features of redux-module-builder by building a relatively complex app to track events in realtime using the custom backend at https://github.com/fullstackio/realtime-news/ to serve a Twitter stream API which serves as a proxy for calling Twitter methods and handling Twitter streams.

We have a production version of the backend running at https://realtime.fullstackweb.org/ that you should feel free to use to complete this post. But we urge you to stand up your own if you want to keep your service running. We offer no QoS (quality of service) guarantees of the server being kept up.
In our app, we'll create a few redux modules, each with their own responsibility:
| name | file path | description |
|---|---|---|
| users | src/redux/modules/users.js | responsible for keeping track of the current user |
| events | src/redux/modules/event.js | responsible for getting upcoming events |
| images | src/redux/modules/images.js | responsible for getting images associated with an event |
| currentEvent | src/redux/modules/currentEvent.js | responsible for connecting to a websocket and live updating an event's data |
Building a redux module
The redux-module-builder provides a lot of convenient helpers to build a redux module.
We'll look through several different helpers throughout the process of building our redux modules. The README.md file of the repo contains the full, up-to-date API.
As we previously said, redux-module-builder is built in several different parts so that integration into an existing app is easy. Since it's written in multiple distinct parts, we can use only specific parts we like and not use the parts we don't. Have your own api client/middleware, but want to use the convenient createConstants() function? Use it!
In addition, the redux-module-builder is well-tested and in use in production today.
To get started quickly looking through building a redux module, let's clone our example project from github:
git clone https://github.com/fullstackreact/redux-module-builder-example.git
Let's also install it's dependencies using npm as well:
cd redux-module-builder-example
npm install
Configuring the Application
This app uses dotenv for configuration. In order to configure the application for your own api access, grab an api token from Twitter here and set it in a file called .env at the root for a key called __TWITTER_KEY__.
For instance, say that your twitter key is: abc123. Your .env file should look like:
APP_NAME=liveStream
API_HOST=realtime.fullstackweb.org
API_URL=https://realtime.fullstackweb.org
WS_URL=wss://realtime.fullstackweb.org
TWITTER_KEY=abc123
Our twitter key (for our public back-end) is 9MgEB0T4vtNjcJYcGPPVyCToU. We offer zero quality of service on our back-end and it's possible it could go down at any time. Please boot your own back-end server if you want it to run in production. We've included a section on setting up your own back-end.
Awesome. All of the redux modules are located in the src/redux/modules directory of the app. We'll spend most of our time in this directory.
createConstants()
The Redux pattern does a fantastic job of helping us discern different actions based upon constant action types.
In the simplest redux setup, we'll usually export individual constants that may or may not be unique in an application from different files across the stack. For instance:
// In src/redux/actionTypes.js, we might have
export const ADD_TODO = "ADD_TODO";
export const REMOVE_TODO = "REMOVE_TODO";
// and we'll import these later to use them in another file, like:
import { ADD_TODO, REMOVE_TODO } from "./actionTypes";
Not only does this get verbose and tedious, but it's error-prone and not necessarily globally unique, especially when creating constants that are the names of common tasks. At its heart, the issue is quite simple: Actions are just string literals. Actions that describe events intended for one part of the state tree might accidentally affect other parts of the state tree if you re-use the same string literal. This node module helps you namespace to avoid these collisions by providing the function createConstants().
The createConstants() function accepts a single argument (either a string or a configuration object) that defines methods for creating an object that holds unique values for each type.
Let's see an example:
import { createConstants } from "redux-module-builder";

export const types = createConstants("users")("SIGNUP", "LOGIN", "LOGOUT");
The createConstants() function creates 3 keys on the types object referenced by their name, but points to a unique string for each as the value of the type object.
The createConstants() function returns an object which prepends the 'users' string to the constant name, yet retains the name of the constant by the value. That is, the types object from above actually looks like:
{
  "SIGNUP": "USERS_SIGNUP",
  "LOGIN": "USERS_LOGIN",
  "LOGOUT": "USERS_LOGOUT"
}
We use these types from the users module by calling it from the type methods. For instance, later in the same file, we can reference the SIGNUP type by types.SIGNUP, rather than USERS_SIGNUP. To use this in a different file, we can import it using the import-as syntax:
// In the same file, later:
dispatch({ type: types.SIGNUP });
// In another file, we can import this file by the name
import { types as userTypes } from "redux/modules/users";
// and use it by the variable name `userTypes`
dispatch({ type: userTypes.SIGNUP });
Using the createConstants() function helps create a clean and consistent way of creating constants, while avoiding name collisions in events.
API constants
While we'll look at the API constants more in-depth in a few sections, let's take a peek at this nifty functionality now.
Let's say that we're working with an API. We know we're going to have requests to the API for logging-in and logging-out. In Redux, it's conventional to emit actions corresponding to your request's lifecycle: loading, success, and error actions.
With redux-module-builder, we can specify that a particular constant represents an API request like this:
import { createConstants } from "redux-module-builder";

export const types = createConstants("users")(
  "SIGNUP",
  { LOGIN: { api: true } },
  { LOGOUT: { api: true } }
);
Now, the createConstants() function creates a triad of new constants based upon this root word. Our new types object looks like this:
{
  "SIGNUP": "USERS_SIGNUP",
  "LOGIN_LOADING": "API_USERS_LOGIN_LOADING",
  "LOGIN_SUCCESS": "API_USERS_LOGIN_SUCCESS",
  "LOGIN_ERROR": "API_USERS_LOGIN_ERROR",
  "LOGIN": "USERS_LOGIN",
  "LOGOUT_LOADING": "API_USERS_LOGOUT_LOADING",
  "LOGOUT_SUCCESS": "API_USERS_LOGOUT_SUCCESS",
  "LOGOUT_ERROR": "API_USERS_LOGOUT_ERROR",
  "LOGOUT": "USERS_LOGOUT"
}
Notice that it creates constants matching the three states of our API requests, *_LOADING, *_SUCCESS, and *_ERROR. createConstants() basically guarantees we'll never have a naming collision between different modules again.
We can create custom constant types as well. For instance, let's imagine we want to add a custom websockets-like type that dictates if a system is online. We can create a custom type by passing in a customTypes object into createConstants() and using it in our constant creation.
For instance, let's create a sockets custom type and maybe a cached custom type. We'll use these to create constants in our system:
export const types = createConstants({
  prefix: "users",
  customTypes: {
    sockets: ["online", "offline"],
    cached: ["cached", "uncached"]
  }
})(
  { SIGNUP: { types: "sockets" } },
  { LOGIN: { types: ["sockets", "cached"] } }
);
Because we set the customTypes property, we'll have a bunch of new constants we can use:
{
  LOGIN:"USERS_LOGIN",
  LOGIN_CACHED:"USERS_CACHED_LOGIN_CACHED",
  LOGIN_OFFLINE:"USERS_SOCKETS_LOGIN_OFFLINE",
  LOGIN_ONLINE:"USERS_SOCKETS_LOGIN_ONLINE",
  LOGIN_UNCACHED:"USERS_CACHED_LOGIN_UNCACHED",
  SIGNUP:"USERS_SIGNUP",
  SIGNUP_OFFLINE: "USERS_SOCKETS_SIGNUP_OFFLINE",
  SIGNUP_ONLINE: "USERS_SOCKETS_SIGNUP_ONLINE"
}
Our twitter stream app constants
Although we won't always know what constants we'll need when we start out an app, we have a few that we already know we want to create.
Let's say that we are creating an images module (in our sample app, this is located at src/redux/modules/images.js). Our images constants are pretty straightforward. We'll need one to fetch (execute the request) and one to receive and populate the Redux state images:
export const types = createConstants('images')(
  {'GET_IMAGES': { api: true }},
  'MEDIA_ARRIVED'
);
Continuing with our modules, we'll create an events module (at src/redux/modules/event.js) that's responsible for getting upcoming events along with images for the latest events. Both of these we will call out an API, so we'll create themm with our api modifier:
export const types = createConstants('events')(
  {'GET_UPCOMING': { api: true }},
  {'GET_IMAGES': { api: true }}
);
Finally, let's create a currentEvent module which will connect over websockets to the back-end, so our constants won't need to have api state (although, we could create a custom type with websocket status, as we looked at previously):
export const types = createConstants('currentEvent')(
  'TWEET_ARRIVED',
  'MEDIA_ARRIVED',

  'DISCONNECTED'
);
One of the nice things about this setup already is that it's very clear where the division of responsibility is to handle types for each different module of functionality of our app.
Actions
Our app is kind of useless without any actions or actionCreators. One of the nicer features of using Redux is that we can work with React as though our data is tied to the UI, rather than mucking with the data container directly.
We'll use actions to dispatch events with a type that we can set up reducers to listen for events. Actions are simple objects with a type and an optional payload. In our Redux modules, we can export an actions object (with the key being the name of the action and the value being the object or function that returns an object) to compose the possible actions exposed by the module.
One of the features we get by setting up our app in the way that we have is that we've moved all of the responsibilities for creating these actions into their own individual "modules." The actions in a redux module are just objects.
export const actions = {
  doSomething: () => ({ type: types.SOMETHING }),
  runSomething: msg => ({ type: types.RUN, payload: msg })
};
For instance, let's start out by creating our users actions. Since we'll be using twitter to authenticate and make requests against, let's incorporate a signin process using our realtime-news repo app using the fantastic hello library.
We've included a how to set up hello.js section to set up the realtime-news server, so head over there if you need to set it up yourself, or continue along with us first.
In our src/redux/modules/user.js file (in the sample repo), let's create a loginWithTwitter() action in our users module so we can call it from an action in our view.
Since we're not using a Twitter login RESTful API with our loginWithTwitter() action in our users redux module actions export, we can set it as a simple function without any redux-module-builder helpers.
Let's make sure we have a few types in our users module:
export const types = createConstants('users')(
  'LOGIN',
  'LOGGED_IN',
  'ERROR_LOGGING_IN'
);
Now, we can use these types in calling the hello("twitter").login() function in an actions object. For instance:
export const actions = {
  loginWithTwitter: () => (dispatch, getState) => {
    hello('twitter').login()
      .then(res => {
        dispatch({type: types.LOGGED_IN, payload: res});
      }, err => {
        dispatch({type: types.ERROR_LOGGING_IN, payload: res});
      })
  }
}
With a login button, we can call this loginWithTwitter() action using the actions prop we'll pass down through the app.
Let's set up a login button. We can place the <Login /> component in our root view. Since this component is straightforward and pretty simple, we'll use a functional stateless component (aka a component that does not require a class/this object).
Inside the file src/views/main/Login/Login.js, let's store the <Login /> component like so:
import React from 'react';
import styles from './login.module.css'
import classnames from 'classnames'

export const Login = (props) => {
  const authorizeTwitter =
    () => props.actions.users.loginWithTwitter()

  return (
    <div className='ui middle aligned center aligned grid'>
      <div className={classnames(['column', styles.loginColumn])}>

          <div className="ui message">
            <p>This app is a demo for the blog post <a href="#">Better Redux with Redux Modules</a></p>

            <p>When you authenticate with Twitter below we will use the token to
            show you a demo app which shows a live stream of tweets.</p>
          </div>

          <form className="ui large form">
            <div className="ui stacked segment">

              <div className="ui fluid large pink submit button"
                   onClick={authorizeTwitter}
              >Login with Twitter</div>
            </div>
          </form>
      </div>
    </div>
  )
}

export default Login;
When our user clicks the button, the hello library will be called by the users.loginWithTwitter() action.
The redux-module-builder provides some helpers for dealing with API calls that deal with promises. In fact, it provides an API client, complete with request/response transformations and error handling.
Let's create an action to see how this works. We'll want to make a request to get our upcoming events from our backend.
Let's move to our src/redux/modules/events.js module and create an action that we'll call getUpcomingEvents().
The redux-module-builder provides a function called createApiAction() which will create an action that works with the apiMiddleware we set up in our configureStore() function.
The createApiAction() method takes two arguments, the first one being the action type to call. For instance, in our getUpcomingEvents() function, we'll use it to handle out GET_UPCOMING event:
export const types = createConstants("events")({ GET_UPCOMING: { api: true } });

export const actions = {
  getUpcomingEvents: createApiAction(types.GET_UPCOMING)((client, opts) => {
    // This function is run when the `getUpcomingEvents()`
    // action is called
  })
};
The createApiAction() function returns a function that is called when the action itself is called with an instance of the apiClient, which is a simple proxy class that sits above the fetch function.
This function is for convenience purposes, but does not have to be used. The only requirement is that a promise is returned, so we can use any API client here if you prefer to use another one. The apiClient instance passed in is fairly feature complete, so we'll use it to make our api call:
export const types = createConstants("events")({ GET_UPCOMING: { api: true } });

export const actions = {
  getUpcomingEvents: createApiAction(types.GET_UPCOMING)((client, opts) => {
    return client.get({
      path: "/events/upcoming"
    });
  })
};
More documentation on the
apiClientitself can be found in the README of the redux-modules source.
We get access to all of the options our method is called with in the opts (second argument the function is executed with), which includes the apiMiddleware options. For instance, if we want to call the getUpcomingEvents() function with a start and end date, we might refactor the action function like so:
export const types = createConstants("events")({ GET_UPCOMING: { api: true } });

export const actions = {
  // calling our action elsewhere like so:
  // getUpcomingEvents({startAt: '2016-01-01'})
  getUpcomingEvents: createApiAction(types.GET_UPCOMING)((client, opts) => {
    const startAt = opts.startAt || moment().subtract(1, "year");
    const endAt = opts.endAt || moment().add(1, "year");
    return client.get({
      path: "/events/upcoming",
      params: { startAt, endAt }
    });
  })
};
If we want to modify the return value of the api request after it has been received, we can create a chain and return the value of the promise chain as the return value of the function. For instance, our events api returns JSON with the key of events. Since we don't need to use any other information returned from the api request, we can modify the previous action to only return the events:
export const actions = {
  getUpcomingEvents: createApiAction(types.GET_UPCOMING)((client, opts) => {
    const {count} = opts;
    return client.get({
      path: '/events/upcoming',
      params: {count},
    }).then(res => res.events);
  })
};
While we are at it, let's add the api action to fetch images from our server. We'll use a straight-up api action, similar to what we did with the events module. Instead of just returning back the JSON response values, however, we'll modify the return value so that we collect only tweets with media attached and return back only the images:
export const actions = {
  // Create an API action that fetches images contained in tweets
  getLatestImages: createApiAction(types.GET_IMAGES)((client, opts) => {
    const {event} = opts;
    return client.get({
      path: '/tweets/images'
    }).then(({tweets}) => {
      const {statuses} = tweets;
      const images = [].concat
        .apply([],
          statuses
            .map(t => t.entities.media)
            .filter(t => !!t));
      return images;
    })
  })
}
Finally, let's complete our last modules action with our currentEvent module which creates a websocket connection to our backend.
We'll create this action in our src/redux/modules/currentEvent.js module, which is responsible for handling any updates to the current event our user is interested in. This action is not an API action, so although the implementation looks complex, it's a simple JavaScript method to connect to a websocket backend.
Without going into too much detail, the action is:
let ws; // the websocket
const actions = {
  wsConnect: evt => (dispatch, getState) => {
    const { currentUser } = getState().users;
    ws = new WebSocket(__WS_URL__ + "/ts");
    // on a message, dispatch the `TWEET_ARRIVED` action
    ws.onmessage = event => {
      dispatch({
        type: types.TWEET_ARRIVED,
        payload: JSON.parse(event.data)
      });
    };

    ws.onopen = () => {
      ws.send(
        JSON.stringify({
          type: "searchTag",
          tag: evt.hashtag,
          ...credentials
        })
      );
    };
  }
};
When our websocket connects to our backend, we'll send the hashtag of the event we're interested in and our backend will do the work to connect through the twitter streaming api. When a twitter stream flows in, the websocket will receive a message and we'll dispatch a message of TWEET_ARRIVED. We don't need to mess with any data or react view underneath. It's just like every other action.
Redux is only useful when we have handlers for actions emitted by the front-end. The redux-module-builder also provides helpers for building reducers.
Handling the actions
In redux, we'll need to handle some actions. The redux terminology for these handlers are called reducers. Reducers are generally very simple functions that either return a simple object or return a function (in the case of redux-thunk) that dispatch an action object.
createReducer()
redux-module-builder exports a function called createReducer, which is actually a very thin wrapper to check for the existence of a handler for a particular type. If a handler is found, the handler is executed and the return value is expected to be the new, updated state. If no handler is found for the action type, then the current state is passed through as the new state.
Pseudocode of this process might look similar to the following. Assume we have an actions object and a reducer created as we do below:
// for instance, dummy example with a `user` service
// that provides the `.login()` function to log a user
// in and returns a promise
const actions = {
  login: (username, password) => {
    return dispatch => {
      user.login(username, password).then(user =>
        dispatch({
          type: types.LOGGED_IN,
          user: action.payload
        })
      );
    };
  }
};

const reducer = createReducer({
  [types.LOGGED_IN]: (state, action) => ({
    ...state,
    user: action.payload
  })
});
When the action types.LOGGED_IN is dispatched (which would actually be the action USERS_LOGGED_IN when using the createConstants() method), the key is matched to the function in the createReducer() function and the function is called with the return value being the new state.
If an action is dispatched with types.LOGGED_OUT, on the other hand, the reducer does not handle it. Instead, the original state is passed through as the new state.
The createReducer() function provides a simple, consistent manner to handle reducer operations. In addition, it allows us to create a function as a reducer rather than a gigantic switch statement. Using a function gives us the ability to decorate them with additional functionality.
Let's handle our previous users redux module's USERS_LOGGED_IN function. When the types.LOGGED_IN action is dispatched, we know that it's getting called with the new user. Our src/redux/modules/users.js action can simply store the current user in the state:
export const reducer = createReducer({
  [types.LOGGED_IN]: (state, {payload}) => {
    return {
      ...state,
      currentUser: payload.authResponse
    }
  }
});
Since these are functions, we can decorate them with other functions. In addition, we can use the fact that they are simple functions to create multiple handlers for our virtual constant types (such as the api types).
createApiHandler()
The redux-module-builder exports another helper called createApiHandler() which creates a reducer responsible for handling different statuses of an api request.
For instance, our src/redux/modules/images.js module needs to handle the success action for when the GET_IMAGES action is fired.
Let's create a reducer that handles the response value from our getLatestImages() action. This action will fire the types.GET_IMAGES_SUCCESS constant. Our reducer simply needs to respond to the success action and store the images in the new state:
export const reducer = createReducer({
  ...createApiHandler(types.GET_IMAGES)((state, {payload}) => {
    return {...state, images: payload};
  })
});
Notice that we're extending the object by adding several api handlers at once into the reducer using the ... spread syntax.
The createApiHandler() function accepts a type as the first argument, which serves as the base type.
For the cases where we want to handle the LOADING and ERROR state, we can either set those as an action in the same was as we did with any other reducer. Alternatively, we can pass a second argument into the function to handle these states.
For example, our events module provides another case where we are going to respond to an api action (i.e. using the createApiAction() function). Let's add the handling of the LOADING and ERROR states in this function.
We'll pass a second argument to the createApiHandler() function, which is a function that accepts a single argument of apiTypes, which contains the custom API types of:
- apiTypes.LOADING
- apiTypes.SUCCESS
- apiTypes.ERROR
We can use these constants to define handlers for these different actions:
export const reducer = createReducer({
  ...createApiHandler(types.GET_UPCOMING, (apiTypes) => ({
      [apiTypes.LOADING]: (state) => ({...state, loading: true}),
      [apiTypes.ERROR]: (state, {payload}) => ({...state, loading: false, errors: payload})
  }))((state, {payload}) => {
    return {
      ...state,
      loading: false,
      errors: null,
      events: eventsMap(payload)
    }
  }),

});
Last, let's move to working with our src/redux/modules/currentEvent.js module which connects through the websocket connection. We'll need to set up a handler that handles storing the new tweets when they arrive back from the websocket server.
We'll also want to only track the latest 10 tweets, so we'll create a "stack" in an array to only hold on to the latest ones. Let's start out by extending the Array class to include a function we'll call shiftMax.
The shiftMax function will essentially be a property on the array that holds only a certain count of numbers on the array itself. The implementation is straightforward enough. Let's create the shiftMax function on the Array.prototype in a file at src/utils/array.js:
Object.defineProperty(Array.prototype, 'shiftMax', {
  configurable: false,
  enumerable: false,
  writable: false,
  value: function(value, max) {
    if (this.length >= max) {
      this.splice(this.length - 1, 1);
    }
    return this.unshift(value);
  }
})
This is just one method for handling a maximum value array. There are many other methods for dealing with arrays with a maximum length.
With the shiftMax function, this will allow us to shift a value on any array and ensure that it only keeps the latest max values.
Back in our reducer, we can use this new function to store only so many tweets on the tweets array:
export const reducer = createReducer({
  [types.TWEET_ARRIVED]: (state, { payload }) => {
    const { tweets } = state;
    tweets.shiftMax(payload, 10);
    return { ...state, tweets };
  }
});
The only issue with this as it stands right now is that the Twitter stream can sometimes send out duplicates (even if it doesn't mean to). We can handle filtering duplicates on the server or on the client-side. For sake of demonstration, we'll handle it here in the client-side.
Essentially, we'll want to keep track of the tweet ids that we have already received and only shift the new ones into our tweets array. We can modify our previous reducer to handle keeping track of our new tweet handler:
export const reducer = createReducer({
  [types.TWEET_ARRIVED]: (state, { payload }) => {
    if (state.tweetIds.indexOf(payload.id) < 0) {
      const { tweets } = state;
      tweets.shiftMax(payload, 10);
      const tweetIds = tweets.map(t => t.id);
      return { ...state, tweets, tweetIds };
    } else {
      return state;
    }
  }
});
Now, sometimes we'll want to use another module's constants in one module to the next. redux-module-builder does nothing to prevent this from happening. In fact, it's pretty easy to handle.
In our currentEvent module, let's watch for any new images to come in from the GET_IMAGES_SUCCESS action dispatch. Let's pull over the images types from the images redux module by importing a glob of objects in our src/redux/modules/currentEvent.js file:
import * as images from './images'
With the images object, we can move down to the reducer and set a reducer to run when the images.types.GET_IMAGES_SUCCESS action is dispatched:
export const reducer = createReducer({
  [types.TWEET_ARRIVED]: (state, { payload }) => {
    if (state.tweetIds.indexOf(payload.id) < 0) {
      const { tweets } = state;
      tweets.shiftMax(payload, 10);
      const tweetIds = tweets.map(t => t.id);
      return { ...state, tweets, tweetIds };
    } else {
      return state;
    }
  }
});
That's it! Now our currentEvent module will also run when the GET_IMAGES_SUCCESS action is dispatched.
Now that we've created a few redux modules, let's use them to create our demo application. The rest of this post is dedicated to set-up and discussions of usage of the redux modules.
Configure and set-up
Let's create a project where we'll use the new package.
In order to get going quickly, we'll use the same structure we offered in a previous post about building react apps called cloning yelp. This way, we can skip talking about how/why we set up react in a particular way and jump right into discussing redux-module-builder.
If you prefer to use another boilerplate or set-up, feel free to jump to the next section.
redux-module-builderis not dependent upon this app structure. We're just using it in this post to get an app started up and running quickly.
We'll use the handy yeoman generator to generate the same structure for our app that we used in the Yelp post. We've pushed this up to npmjs, so it's easy enough to install in the usual manner.
Let's run our generator we dive into detail about in the cloning yelp post in a development directory:
mkdir app && cd $_ npm install yo generator-react-gen
In the same directory, let's create the default stack from the Yelp post. We can ask yeoman to generate this structure:
yo react-gen
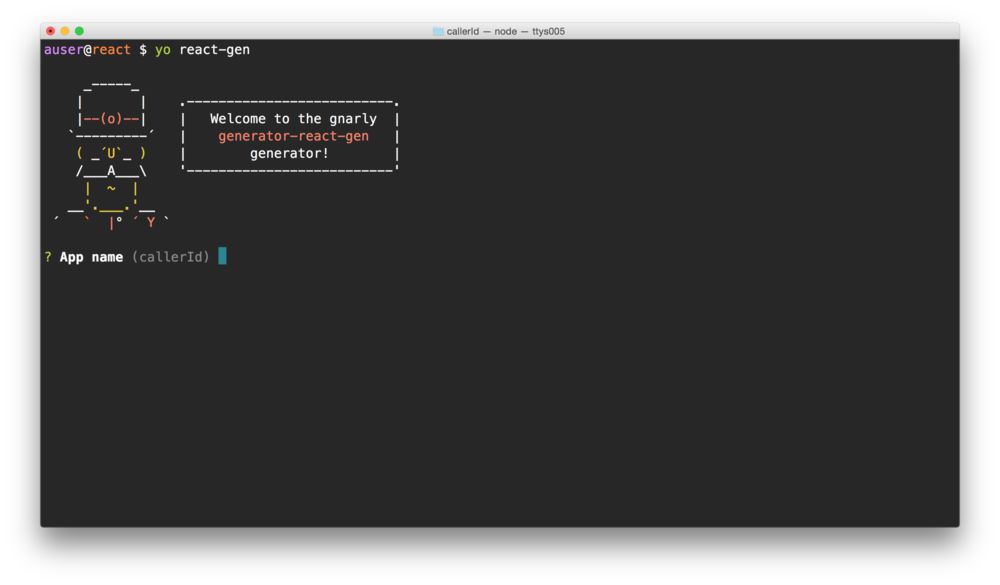
If you want to skip this set-up process, the generator can handle a large part of it for us. See the Adding in redux section note for using the generator to build it for us.
We can boot up our app by using the npm start package script bundled with the generator:
npm run start
The app setup
This section is optional, as the example repo does this setup for us already. The following content discusses the process of configuring the store and the rootReducer.
As we've already started walking through our example app, we'll need to configure our store to use the redux modules as well as set up the redux modules in the root reducer.
1. Configuring the store
Let's configure our store. Let's create a a configureStore.js file to handle the store configuration for us. We'll import this file when we boot the app to configure our store.
In the src/redux/configureStore.js file, let's export a single function we'll call that we can use to configure our store:
export const configureStore = () => {};
We like to store our routing configuration in the state.
Since we'll make our router state be reflected in our store, we'll need to set up the router middleware. Rather than export a some constants (actions, the store, etc.), we'll export a function, and return these constants. We can call the function configureStore() and pass through some configuration options in our configureStore() call and use them here.
Let's have the userInitialState defined alongside the react router history type:
export const configureStore = ({
  historyType = browserHistory,
  userInitialState = {}
}) => {
  // create and return the store in here
};
Let's go ahead and start implementing our configureStore() function.
apiMiddleware
As we have some actions that require us to communicate with a back-end server, we'll need to set up a middleware to deal with API requests. In order to set this up, we'll need add a middleware. Since redux-module-builder allows us to define a generalized, globally-available middleware, we'll need to set it up in our redux store.
Our npm module makes this easy to handle. Let's import the createApiMiddleware() function from our package redux-module-builder. While we're at it, let's also import the redux-thunk middleware along with the routerMiddleware from react-router-redux:
import { createApiMiddleware } from 'redux-module-builder/api';
import { routerMiddleware, syncHistoryWithStore } from 'react-router-redux';
The createApiMiddleware() function is really simple and handles accepting methods we'll use in redux-module-builder to execute our API requests. Since we're dependent upon the thunk middleware, we'll need to include it in our middleware stack somewhere after our createApiMiddleware() function.
We like to create an array of middlewares in our configureStore() function, so let's look at how to do that inside the configureStore() method:
    let middleware = [
      createApiMiddleware({
        baseUrl: __API_URL__,
        headers: {
          'X-Requested-By': 'liveStream client'
        },
        requestTransforms: [
          (getState, opts) => (req) => {
            const {users} = getState();
            const {currentUser} = users;
            if (currentUser) {
              req.headers['x-auth-token'] = currentUser.oauth_token;
              req.headers['x-auth-secret'] = currentUser.oauth_token_secret;
            }
            return req;
          }
        ]
      }),
      thunkMiddleware,
      routerMiddleware(historyType)
    ]
Our simple middleware array contains three middlewares (the routerMiddleware is required for using react-router-redux, which is middleware that handles keeping the routing in redux).
Using this middleware stack is pretty straightforward. We'll use the compose() function provided by redux.
The compose() function takes a list of functions and provides the argument of the last function as the input for the previous function (FILO -- first in, last out). Mathematically, this is equivalent to:
compose(f, h, g) = f(g(h(...args)))
The compose() function returns a function which accepts a single function as the final function to call. With redux, we'll call the return function with createStore(), the function provided by Redux to create a function that to call createStore().
This process sounds complex. In overly-verbose pseudocode, this looks like:
let g = applyMiddleware(middleware1, middleware2);
let h = compose(middlewareStack);
let f = createStoreWithMiddlewareFunction(createStore);
// compose(f, h, g) =
//   f(h(g(rootReducer, userInitialState)))
const store = f(rootReducer, userInitialState);
However, this can functionally be a bit easier to create without all the verbosity. Back in our src/redux/configureStore.js file, let's create this f(h(g())) function:
    let finalCreateStore;
    finalCreateStore = compose(
      applyMiddleware(...middleware),
      ...tools
    )(createStore);
The
toolsvariable here is a simple array. We'll use it to put some extra tooling in ourfinalCreateStore(), such as building DevTools in our store.
We can use the resulting function to create the actual store using a rootReducer:
    // initialState is imported from the rootReducer file
    // as exports and the userInitialState is a parameter
    // passed into the configureStore function
    const store = finalCreateStore(
      rootReducer,
      Object.assign({}, initialState, userInitialState)
    );
That's it. We've created the store. Well... almost. We haven't actually created/imported the rootReducer, which serves as the top reducer for our store. Let's leave the configureStore() function for the time being and build up our rootReducer.
rootReducer
Let's create (or open) the src/redux/rootReducer.js file. In here, we'll create a few exports so we can consume them in our configureStore() function.
In most redux projects, rootReducer.js contains the root reducer, generated by combineReducers(). The root reducer dictates which parts of the state tree are managed by which reducer functions.
Let's bring in the combineReducers() function first:
import { combineReducers } from 'redux';
Basically, we'll take all of our module's reducers (the module is what we'll build with the redux-module-builder package) and combine them into one.
For instance, we might have a few modules containing users, events, images, etc. Making the rootReducer might look similar to:
export const rootReducer = combineReducers({
  user: function(state, action) {},
  events: function(state, action) {},
  images: function(state, action) {}
});
For the time being, our rootReducer will be tiny. We'll only need to keep the routing reducer available in our store initially. Let's create a reducers variable to hold the reducers object:
export let reducers = {routing};
Although we only have one reducer in our reducers variable, to use it as the rootReducer we'll still use combineReducers():
export const rootReducer = combineReducers(reducers);
That's it. We now have a root-level reducer for our store.
Generating our rootReducer in our configureStore() function is set up. At this point, we have a working store.
Let's load our modules in an object in our rootReducer:
const modules = {
  events: require('./modules/events'),
  currentEvent: require('./modules/currentEvent'),
  images: require('./modules/images'),
  users: require('./modules/users')
};
We'll load each of these modules and combine them and export the three objects:
- initialState
- actions
- reducers
In our app, we can handle this in a straight-forward, programmatic method:
Object.keys(modules).forEach(key => {
  const container = modules[key];
  initialState[key] = container.initialState || {};
  actions[key] = container.actions;
  reducers[key] = container.reducer;
});
Alternatively, we can use the createRootReducer() function to handle this process for us, i.e.:
const mod = createRootReducer(modules, {
  initialInitialState: initialState,
  initialActions: actions,
  initialReducers: {routing}
})
Sometimes we'll want to start out with some initial objects, like a routing action and reducer. We can define the initial objects before we start looping through our modules:
export let actions = {
  routing: {
    navigateTo: path => dispatch => dispatch(push(path))
  }
};
export let initialState = {}
export let reducers = {routing};
This is the process we need to run to set up any redux store in any redux project, with or without redux-module-builder, so it's important to understand it.
Completing our configureStore()
Let's complete syncing our history with the store with the react-router-redux package. The package provides the syncHistoryWithStore() function to make this process easy enough to handle in a single line of code. The function returns the newly created history instance.
The syncHistoryWithStore() function accepts the history type (in our case, we'll pass this into the configureStore() function), the store, and some options:
    // Using the `const store =` variable we just created
    const history = syncHistoryWithStore(historyType, store, {
      adjustUrlOnReplay: true
    })
We'll need to pass back this history variable we just created. At the same time, we can return the store as well:
export const configureStore = ({
  historyType = browserHistory,
  userInitialState = {}
}) => {
  // ...
  return { store, history };
};
3... 2... 1... Action
In redux-module-builder, we like to keep our actions bundled together in an actions object. Although this is a personal preference, we find bundling the actions together in a single object helps us maintain an easy, consistent interface to our apps, in testing and in practice.
Since we're currently only working with a single reducer (the routing reducer), our actions object will be simple. Let's create a single action with a single function: navigateTo which can push a new route on the routing stack.
In our src/redux/rootReducer.js file, let's export an actions object with this routing action. We'll rely on our middleware set up with redux-thunk.
Let's make sure we import the routerReducer as well as the push() function from react-router-redux:
import { routerReducer as routing, push } from 'react-router-redux';
Then we can use this function to build our navigateTo action we'll use to change the current browser route:
export let actions = {
  routing: {
    navigateTo: path => dispatch => dispatch(push(path))
  }
};
We have our actions object. None of our actions are aware of this routing action, nor is the store aware of them.
However, we can bind our actions to the store's dispatch function such that when any of our actions call dispatch, the store's reducers can manage the state response. This is where another redux-module-builder helper (the bindActionCreatorsToStore() function) can help us out.
Let's import the bindActionCreatorsToStore() function and pass through our imported actions and store object back in our src/redux/configureStore.js file:
import { bindActionCreatorsToStore } from 'redux-module-builder';
Now, we can bind the actions we created previously to the store's dispatch function. For the time being, we have one action we defined in the rootReducer file called navigateTo in the actions object. Binding the action to the store will allow us to call the dispatch() function and have the store's reducer-chain respond as we expect. Without this binding, calling dispatch() wouldn't do much of anything:
const boundActions = bindActionCreatorsToStore(actions, store);
Last, let's return our boundActions object from configureStore() so we can use it in our view:
    const boundActions = bindActionCreatorsToStore(actions, store);
    return {store, actions: boundActions, history}
Now we can use the actions from our configureStore() function call.
Awesome! Now we have our actions returning from the configureStore() function and we're set to use this in our mounted React app component.
Tying the store to the app
We've completed the set-up of the redux store using basic Redux method. In this way, the entire responsibility of setting up redux is contained within the src/redux/ directory structure and we can use the set up by importing the src/redux/configureStore.js file and running the configureStore() function we created above.
We'll need to tie the store itself to our app. This means we'll run the configureStore() function and get back the store that we can use throughout our app. Since we've done all the heavy-lifting up to this point, we can just import and call the function in our app code.
In our src/app.js file (the main app file), we can handle this in a couple of lines of code. Let's bring in the history package hashHistory type and pull in the configureStore() function from our src/redux/configureStore.js file:
import {hashHistory} from 'react-router'
import {configureStore} from './redux/configureStore'
We can call the configureStore() function with an initial state, be it empty or not. We'll need this as we set it as an argument in the configureStore() function.
const {store, actions, history} =
  configureStore({initialState, historyType: hashHistory});
We can pass our new store, actions, and the history objects into our <App /> container component (which we'll look at shortly):
const makeRoutes = require("./routes").default;
const routes = makeRoutes(store);
// ...
const mountNode = document.querySelector("#root");
ReactDOM.render(
  <App history={history} store={store} actions={actions} routes={routes} />,
  mountNode
);
We don't need to worry about the
routerKeyfor the time being, but it's good to know about. We'll look through it when we talk about hot module reloading later in this post.
With react-redux, we can tie a redux store to a component using the package's <Provider /> component.
Let's run this with our src/containers/App/App.js file, let's accept these props and render out our component wrapped in the <Provider /> component.
Let's update the render() function to include the <Provider /> component wrapped around the content in our src/containers/App/App.js file, so that our component can have access to the Redux store:
export class App extends React.Component {
  // ...
  render() {
    return (
      <Provider store={this.props.store}>
        <div>{this.content}</div>
      </Provider>
    );
  }
}
For every route we create through the react-router, we'll want to pass through the actions prop we export from our configureStore() function. Since the content of our <App /> container contains the <Router /> element, we can handle setting it up through the content property on in the <App />.
We can render our routes using the routes passed in through the props along with the history object. Since we'll want to pass the actions props all the way through the app, even regardless of the component level we are at, we will need to create each element with the actions prop.
The react-router package makes this simple by passing in a createElement prop which will get called for every route render. We can use this function to clone the component and add custom props. Specifically, its allows us to pass through the actions prop.
  get content() {
    const { history, routes, routerKey, store, actions } = this.props;
    let newProps = {
      actions,
      ...this.props
    }

    const createElement = (Component, props) => {
      return <Component {...newProps} {...props} />
    }

    return (
      <Router
        key={routerKey}
        routes={routes}
        createElement={createElement}
        history={history} />
    )
  }
We're done with our set-up. Let's start using the redux-module-builder to build some redux modules.
To skip this set-up process entirely (i.e. have it set-up automatically), we can pass the
--reduxfeature flag to ouryeomangenerator>yo react-gen --reduxIt is a good idea to understand what this generator is doing and creating for us.
Developer tooling (optional)
One of the coolest features of using redux is the developer tooling is just so fantastic. Let's set up our app to use these devtools so we can use them in building our app. Let's install the redux-devtools:
npm install redux-devtools
Let's also install a few of the monitors. Although there are several custom monitors, we'll use some basic ones:
npm install redux-devtools-log-monitor redux-devtools-dock-monitor
When using the devTools, let's create a container to mount our dev tools inside, hiding it by default. It's a straightforward component that will be mounted inside the body of our app. The component might look something similar to:
import React from 'react'
import { createDevTools } from 'redux-devtools'
import LogMonitor from 'redux-devtools-log-monitor'
import DockMonitor from 'redux-devtools-dock-monitor'

export default createDevTools(
  <DockMonitor
    toggleVisibilityKey='ctrl-h'
    changePositionKey='ctrl-q'
    defaultIsVisible={false}>
    <LogMonitor />
  </DockMonitor>
)
The component itself has many options. Personally, we like to prefer hiding it by default (and pressing ctrl+h to show it):
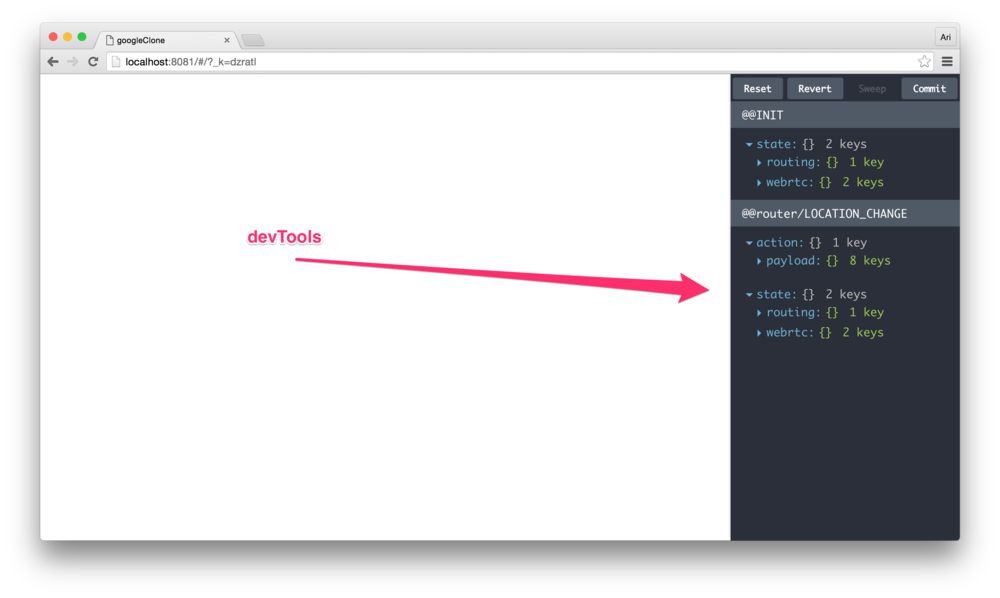
We'll need to place our devtools in our view (otherwise they won't be available in the DOM). We like to do this in our <App /> container. Since we already have our <App /> container built, we can handle this in the same manner as we display our content, using a prototype version:
  render () {
     return (
       <Provider store={this.props.store}>
         <div>
           {this.content}
           {this.devTools}
         </div>
        </Provider>
     )
   }
And the implementation of the devTools parameter might look like:
  get devTools () {
    if (__DEBUG__) {
      if (!window.devToolsExtension) {
        const DevTools = require('containers/DevTools/DevTools').default
        return <DevTools />
      }
    }
  }
When we're running in development mode, we can display the DevTools and have the provider publish nothing if we aren't in development mode using the already set up __DEBUG__ flag from webpack.
Our
webpack.config.jsalready sets up the__DEBUG__flag to be automatically replaced by webpack when running in theNODE_ENV == 'development'.
class App extends React.Component {
  get devTools() {
    if (__DEBUG__) {
      // ...
    }
  }
  // ...
When running in development mode, the devTools() function returns the <DevTools /> component, while in production, the __DEBUG__ flag is false and we won't include the element.
In addition to setting up the view with the devTools, we'll also need to add the devTools tooling to our store. It's for this reason why we create the tools array along with the middleware array in configureStore().
Back in our configureStore() file, let's push the devTools() extension into the compose() function to create our store:
    let tools = [];
    if (__DEBUG__) {
      const DevTools = require('containers/DevTools/DevTools').default;
      let devTools = window.devToolsExtension ? window.devToolsExtension : DevTools.instrument;
      if (typeof devTools === 'function') {
        tools.push(devTools())
      }
    }
Reloading the page and pressing ctrl-h now will show the devTools.
Hot reloading
Since we are developing some files that have a tough time being reloaded, such as the routes, we'll need to set up our app to handle hot reloading in somewhat of a manual way. At least we'll set up the routes to hot reload the page, rather than a hard refresh when we edit the file.
In order to understand how to handle hot reloading in a custom way, we'll need to know how the render function works with ReactDOM.render(). Essentially, the ReactDOM.render() function saves the current state and compares new state to this old state. If any elements are modified, the element will be rerendered in the virtual DOM and subsequently in the browser's DOM.
We can "fake" these changes by looking for any hot changes and changing a prop in the render to change even if there are no major variable changes. Let's update the src/app.js so that we can call the ReactDOM.render() function when we get a hot change as well as before we receive any changes:
let render = (routerKey = null) => {
  const makeRoutes = require('./routes').default;
  const routes = makeRoutes(store)

  const mountNode = document.querySelector('#root');
  ReactDOM.render(
    <App history={history}
          store={store}
          actions={actions}
          routes={routes}
          routerKey={routerKey} />, mountNode);
}
In our render() function, we are passing in an argument we're calling renderKey which is just some random number or undefined. The point is that our routerKey is just a prop that we can change when necessary. We'll call this render() function on first load:
render();
Now, when we receive a hot update, we can call our render function again, this time with a new version of our routes. Since we'll only have hot reloading enabled in development mode, we can run a check to see if we even need to enable this functionality quickly, as we'll see in our app usage:
if (__DEBUG__ && module.hot) {
  const renderApp = render;
  render = () => renderApp(Math.random())

  module.hot.accept('./routes', () => render());
}
Since we'll be working with our redux modules in real-time and changing their structure, and the likes. Let's run through the same process with our rootReducer.
Where we set up our rootReducer, we can call store.replaceReducer to update the reducers under the hot reloading scenario. Let's set this hot reloading up in our configureStore() function so that we can detect a change to the rootReducer (which means any child reducer of the rootReducer) changes under a hot scenario.
Somewhere after we create the store, let's check for the module.hot status and set up an accept process for an updated rootReducer and call store.replaceReducer() when our webpack build chain detects a change:
    if (module.hot) {
      module.hot.accept('./rootReducer', () => {
        const {rootReducer} = require('./rootReducer');
        store.replaceReducer(rootReducer);
      });
    }
Setting up hello
To set up hello, we'll need to install it. The easiest way to install the package is using npm:
npm install --save hellojs
We'll need to set up a twitter app and get some client_id and client_secret variables so we can attach to our backend. Currently, the realtime.fullstackweb.org works using our twitter app keep.
To run your own, you'll need to grab your own copy of the realtime-news server and your own twitter app. You can get a twitter app at the dev.twitter.com dashboard.
Once you have an app, clone the repo and install the dependencies:
git clone https://github.com/fullstackio/realtime-news.git
cd realtime-news && npm install
Once the dependencies are installed, we can either deploy it locally in development (where every change to the backend will restart the server) or to production. First, we'll need to tell the app what our Twitter keys are. The app itself uses a .env file in the root and environment variables.
Either source the environment variables in your environment or set your TWITTER_KEY and TWITTER_SECRET in a .env file at the root:
TWITTER_KEY=YOUR_TWITTER_KEY
TWITTER_SECRET=YOUR_TWITTER_SECRET
Once that's set, to launch the server in a development environment, use the start command:
npm run dev
Launching into production takes a tad more work (but not much). We'll need to build the app first and then run start:
npm run build
npm start
We've also include a docker compose file and a Dockerfile to launch and run it with Docker. Although the server itself uses the local filesystem, using leveldb, it can be switched to a heavier-duty database, such as mongodb or postgresql pretty seamlessly.
In any case, launching the realtime-news stack using docker-compose is pretty easy once you have a docker-machine environment. Setting up docker-machine is out of the scope for this tutorial, but there are plenty of great resources available.
In any case, with a docker-machine environment set up, to launch the realtime-news stack, call the start command to boot it up:
docker-compose start
To set up hello in our app, we'll need to initialize it. Back in our client-side app, we'll need to initialize hello using the TWITTER_KEY. Similar to the realtime-news server, we like to keep these keys in a .env file at the root of the app. If you set up your app to use the yeoman generator, your build system already takes care of wrapping environment variables for different deployment environments.
Let's store the TWITTER_KEY in a development config file at config/development.config.js. We'll also want to make sure the API_URL matches the root of the realtime-news server we started. For now, we'll set this to be localhost:
API_HOST=localhost:8001
API_URL=http://localhost:8001
TWITTER_KEY=YOUR_TWITTER_KEY
When we launch the app, this value can be used in the variable __TWITTER_KEY__. Since we'll be using hello in our app and it's most particularly relevant in our users authentication process, we'll initialize it in our users module at src/redux/modules/users.js (this, of course is a matter of preference).
We'll need to call init on the hello object with our twitter key (to use Twitter). Additionally, we'll also need to pass set the oauth_proxy variable to match our backend in our src/redux/modules/users.js module:
import hello from 'hellojs'

hello.init({
  twitter: __TWITTER_KEY__
}, {
  oauth_proxy: `${__API_URL__}/oauthproxy`
});
Let's boot our app using the usual npm start command at the root:
npm start
We can visit our app in the browser at localhost:3000 by default.
Conclusion
We worked through building a large app with lots of different moving pieces in a sane, comprehendible way using an MIT-licensed package for handling redux apps. We can't recommend this enough and hope that it helps simplify your apps.
If you’re stuck, have further questions, feel free to reach out to us by:
- Commenting on this post at the end of the article
- Emailing us at [email protected]
- Filling an issue on the Github repo
- Tweet at us at @fullstackreact

Learn React the right way
The up-to-date, in-depth, complete guide to React and friends.
Download the first chapter