In this article, we're walking through building a google hangouts clone using our library for handling large applications using redux.
Intro
TODO: Name the app "Hangouts Clone"
Describe redux-module-builder
What we're building
Google Hangouts is a video conferencing service. Like Hangouts, our app will enable users to create "rooms":
[Screenshot] GIF of a user creating a new room
Other users can visit the URL of the room to hop into the hangout:
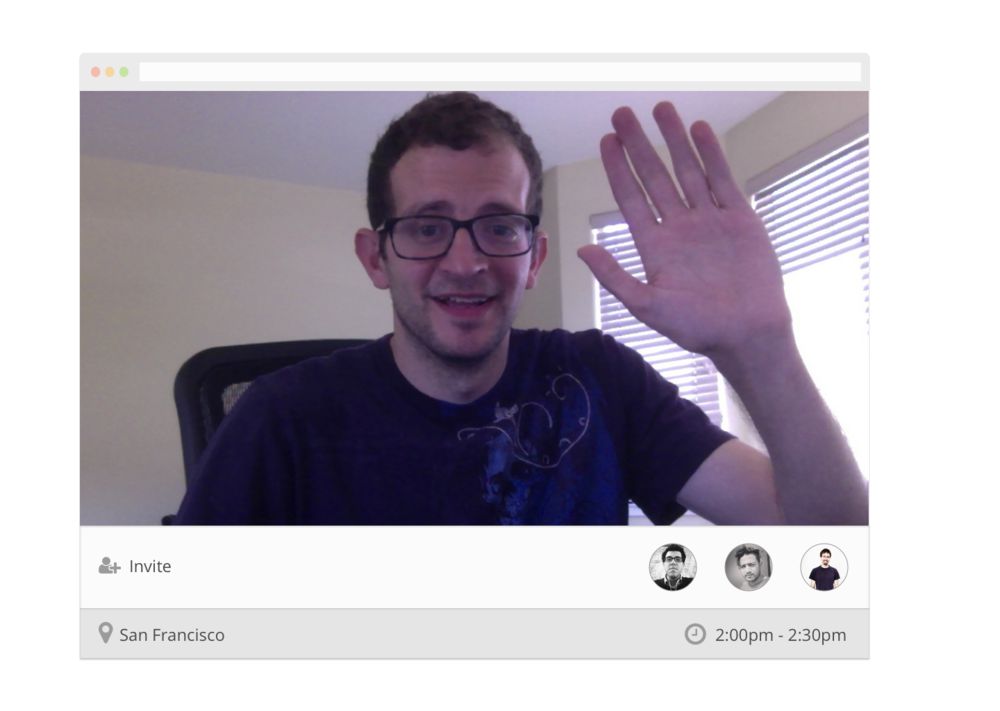
Like Hangouts, our app will support video conferencing between two or more users.
To support peer-to-peer video conferencing, our app will use a pair of open-source protocols: WebRTC and TURN.
WebRTC
To support the video conferencing in our app, we're going to use the relatively new WebRTC web standard. We'll use &yet's fantastic SimpleWebRTC library to do so.
Note that because WebRTC is relatively new, some browsers do not yet support it.
TURN
We'll also need the support of TURN to relay public traffic to devices behind private routers and firewalls.
&yet has published a websocket-based TURN server called signalmaster. At the end of this post, we detail how to deploy your own signalmaster TURN server using an open-source Docker container we created. For now, we'll have our app use Fullstack React's public TURN server we've deployed to AWS for the purposes of this post.
Setup
In a previous post, we built a Yelp clone. A big chunk of that post was devoted to demonstrating the setup and configuration of a React app intended for scale.
Instead of going through that setup procedure again, we'll use a yeoman generator to build the basic setup of our React app. If you're interested in the details behind this setup, we recommend you check out the Yelp post.
We'll first install both Yeoman and our custom Yeoman generator:
npm install -g yo
npm install -g generator-react-gen
Once these are installed, we can then ask Yeoman to generate the structure for our React+Redux app:
mkdir hangouts && cd hangouts
yo react-gen --redux
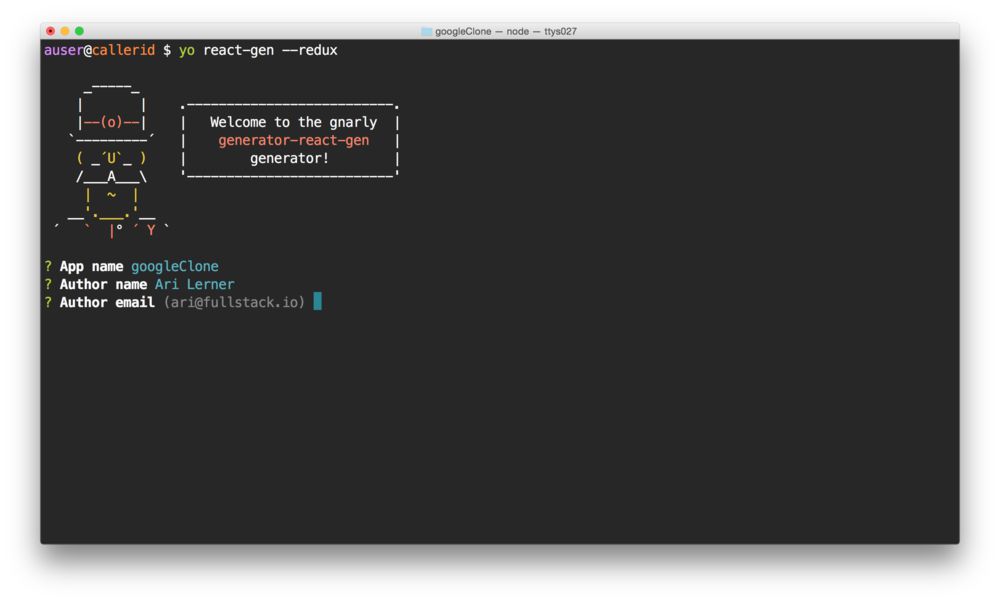
This will create the skeleton of our redux app for us:
[Screenshot] Of the tree of the app
We can boot the skeleton of the app:
$ npm start
And we should be greeted with a basic placeholding page on
localhost:3000/:
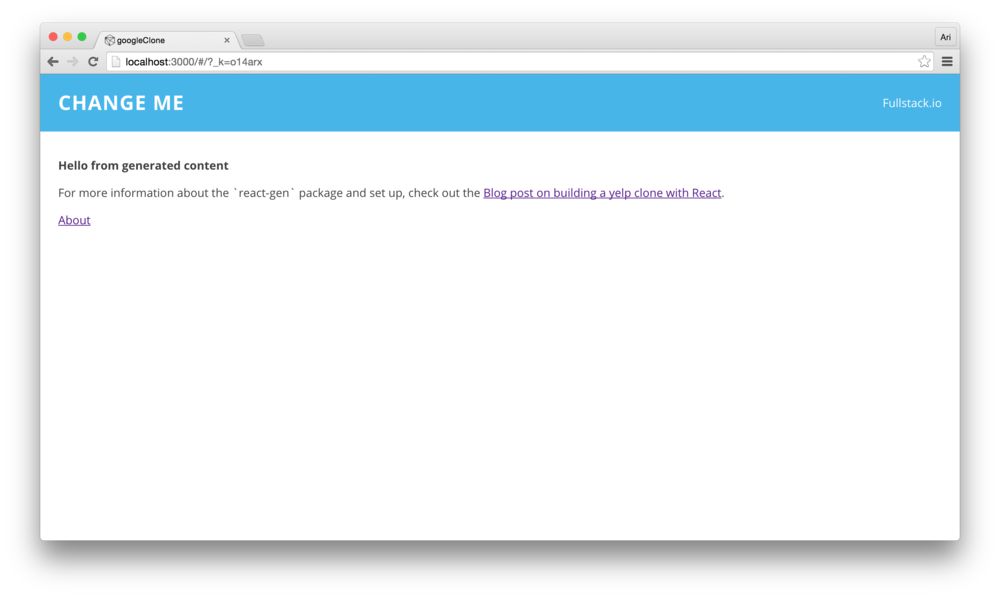
Before getting started, we need to make a few customizations to our setup.
The .env file in the root of our project
specifies environment-specific variables for our app.
It's inside of this file that we specify the URL for our
TURN server. We'll add the variable
TURN_SERVER and set it to Fullstack React's
public TURN server:
# In our /.env file
TURN_SERVER=https://dev.runfullstack.co:8080/
As our Webpack setup uses the
webpack.DefinePlugin() by default, any instance
of the variable __TURN_SERVER__ will
automatically be replaced by the value which we set in the
/.env file in the root of our project. For more
information on how this works and how to set up multiple
environments, check out the post on cloning Yelp.
Module building time
Now that we have the config set up, let's build our
webrtc Redux module. This is where the bulk of
interesting stuff happens in our app. We'll have Redux
dispatch actions based on WebRTC events, decoupling state
management from the WebRTC library.
First, let's install the SimpleWebRTC module
along with the freeice module (which provides a
random STUN or TURN server).
npm install --save freeice SimpleWebRTC
Once these are installed, let's start building our
webrtc redux module in the
/src/redux/modules directory:
touch src/redux/modules/webrtc.js
Let's import our dependencies in the
/src/redux/modules/webrtc.js file:
import SimpleWebRTC from 'SimpleWebRTC'
import freeice from 'freeice'
Now, we're going to require two exports from the
redux-module-builder:
- createConstants
- createReducer
Let's add these imports into our new
webrtc module and the initial exports we'll
expose from our module:
import {createConstants, createReducer} from 'redux-module-builder'

export const types = createConstants('webrtc')();
export const reducer = createReducer({});
export const actions = {}
export const initialState = {}
Whenever we create an action type, we'll need to add it
to the createConstants() function. The
createConstants() function takes a configuration
and creates a unique constant on an object we can
depend upon being available.
That is, in the code sample above, we're creating a
unique constant prepended by the text:
WEBRTC_. For instance, let's create an
action called init() which we will call when we
want to start listening for the webrtc events.
First, let's create the constant:
import {createConstants, createReducer} from 'redux-module-builder'

export const types = createConstants('webrtc')(
  'INIT'
);
// ...
Now we have a single constant on the types object
called types.INIT (which holds the value of
WEBRTC_INIT). Now we can create the
init() action on the actions object
to set up listening for events:
import {createConstants, createReducer} from 'redux-module-builder'

let rtc = null;
export const types = createConstants('webrtc')(
  'INIT'
);
export const actions = {
  init: (cfg) => (dispatch, getState) => {
    rtc = new SimpleWebRTC({
      url: ___TURN_SERVER__,
      peerConnectionConfig: freeice()
    });
  }
}
// ...
The
freeice()function returns back a randomized STUN/TURN server from a list of publicly available, free servers.
Finally, we can use redux here by dispatching redux events when we receive a webrtc event:
Let's listen for the connectionReady event
on the webrtc object itself, which is fired when... as it
sounds when the signaling connection emits a
connect event. When we receive a
connectionReady event along with a unique
connection id, we'll dispatch a redux event
that indicates.
Let's create the CONNECTION_READY type and
dispatch the event type:
export const types = createConstants('webrtc')(
  'INIT',
  'CONNECTION_READY'
);
let rtc;
export const actions = {
  init: (cfg) => (dispatch, getState) => {
    rtc = new SimpleWebRTC({
      url: ___TURN_SERVER__,
      peerConnectionConfig: freeice()
    })
      .on('connectionReady', (id) => {
        dispatch({
          type: types.CONNECTION_READY,
          payload: id
        })
      })
  }
}
// ...
Now, we've fired an event we'll need to provide a way to handle the action. We'll handle this in the redux way by using the reducer to handle the event.
// ...
export const types = createConstants('webrtc')(
  'INIT',
  'CONNECTION_READY'
);
export const reducer = createReducer({
  [types.CONNECTION_READY]: (state, {payload}) => ({
    ...state,
    ready: true,
    id: payload
  })
})
We like to define our initialState in the file
where we define the module. Let's go ahead and set the
ready flag to false initially:
// ...
export const initialState = {
  ready: false
}
Lastly, we'll need to load our module in our
src/redux/rootReducer.js file so that our reducer
is actually handled. The simplest, most straight-forward way
of handling this is pretty simple. Let's load the
webrtc module and load each in our
rootReducer, actions, and
initialState:
import * as webrtc from './modules/webrtc'

export let initialState = {};

export const actions = {
  routing: {
    navigateTo: path => dispatch => dispatch(push(path))
  },
  webrtc: webrtc.actions
}

export const rootReducer = combineReducers({
  routing,
  webrtc: webrtc.reducer
});

initialState.webrtc = webrtc.initialState || {};
It can be a bit cumbersome to load for each module (although it's pretty direct). If you're comfortable with a bit of meta, we can be a bit more programmatic with our approach to loading each of the modules by replacing the entire contents of the file, like so:
import { combineReducers } from 'redux';
import { routerReducer as routing, push } from 'react-router-redux';

const containers = {
  webrtc: require('./modules/webrtc'),
}

export let reducers = {routing}
export let actions = {
  routing: {
    navigateTo: path => dispatch => dispatch(push(path))
  }
}
export let initialState = {};

Object.keys(containers).forEach(key => {
  const mod = containers[key];
  reducers[key] = mod.reducer || {};
  actions[key] = mod.actions || {};

  if (mod.initialState) {
    initialState = Object.assign({},
      initialState, {
        [key]: mod.initialState
      });
  }
})

export const rootReducer = combineReducers(reducers);
We can open up our
/src/redux/configureStore.js file and import the
new initialState (regardless of the methods we
used from above) and modify it to use the initialState:
import { rootReducer, actions, initialState } from './rootReducer';

export const configureStore = ({
  historyType = browserHistory,
  userInitialState = initialState}) => {
    // ...
    const store = finalCreateStore(
      rootReducer,
      userInitialState
    );
    // ...
}
Let's open up a browser and set the url to our localhost
server at
http://localhost:3000/
We can pull open the devTools by pressing the key
combination: ctrl+h and we can see the state and
browser devTools:
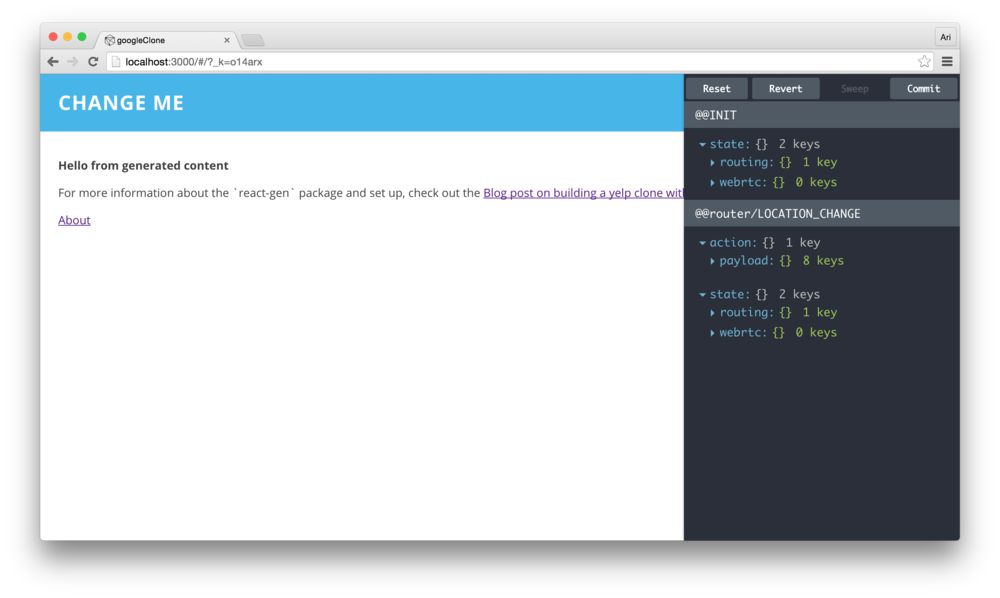
That's it! We've pretty much set up the
underpinnings of our application already, so when our
application boots up and we load the module, the
webrtc module will load and we'll only need
to call the init() function to get the
webrtc started.
Let's kick this bad boy off in our
<IndexPage /> component when the component
mounts. We've already seen how to call the action from
the props, let's call the
webrtc.init() function in our
componentDidMount() function in the generated
file /src/views/main/indexPage/IndexPage.js:
export class Index extends React.Component {
  componentDidMount() {
    const {actions} = this.props;
    actions.webrtc.init({});
  }
  // ...
}
Pulling open the devTools when we can see that we
that the types.CONNECTION_READY event is fired:
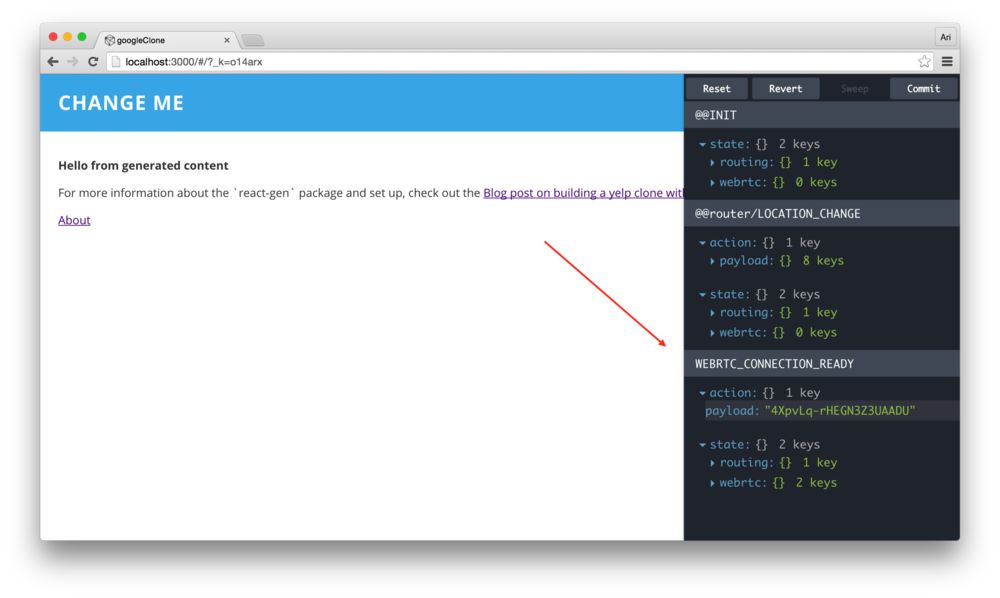
When the types.CONNECTION_READY event is fired,
the new state is created with the state of
ready and the unique connection id is sent and
captured in the new state. We can see the updated state
reflected in the <DevTools /> panel.
We've decoupled the connection event, updated the main store, and connected to the webrtc backend and didn't even touch the view code yet. Pretty rad, eh?
Learn React the right way
The up-to-date, in-depth, complete guide to React and friends.
Download the first chapter