
Deployment
Deployment
Now that we have a functional web application our next step is to get it live on the internet. Earlier in the book, we covered the steps involved to deploy our simple API application to Heroku, but Yumroad is a bit more complicated in that it has a database, has job workers for delayed jobs, uses a Redis cache, and needs SSL.
In order for our application to be accesible to end users, we need to configure each of the pieces of our infrastructure.
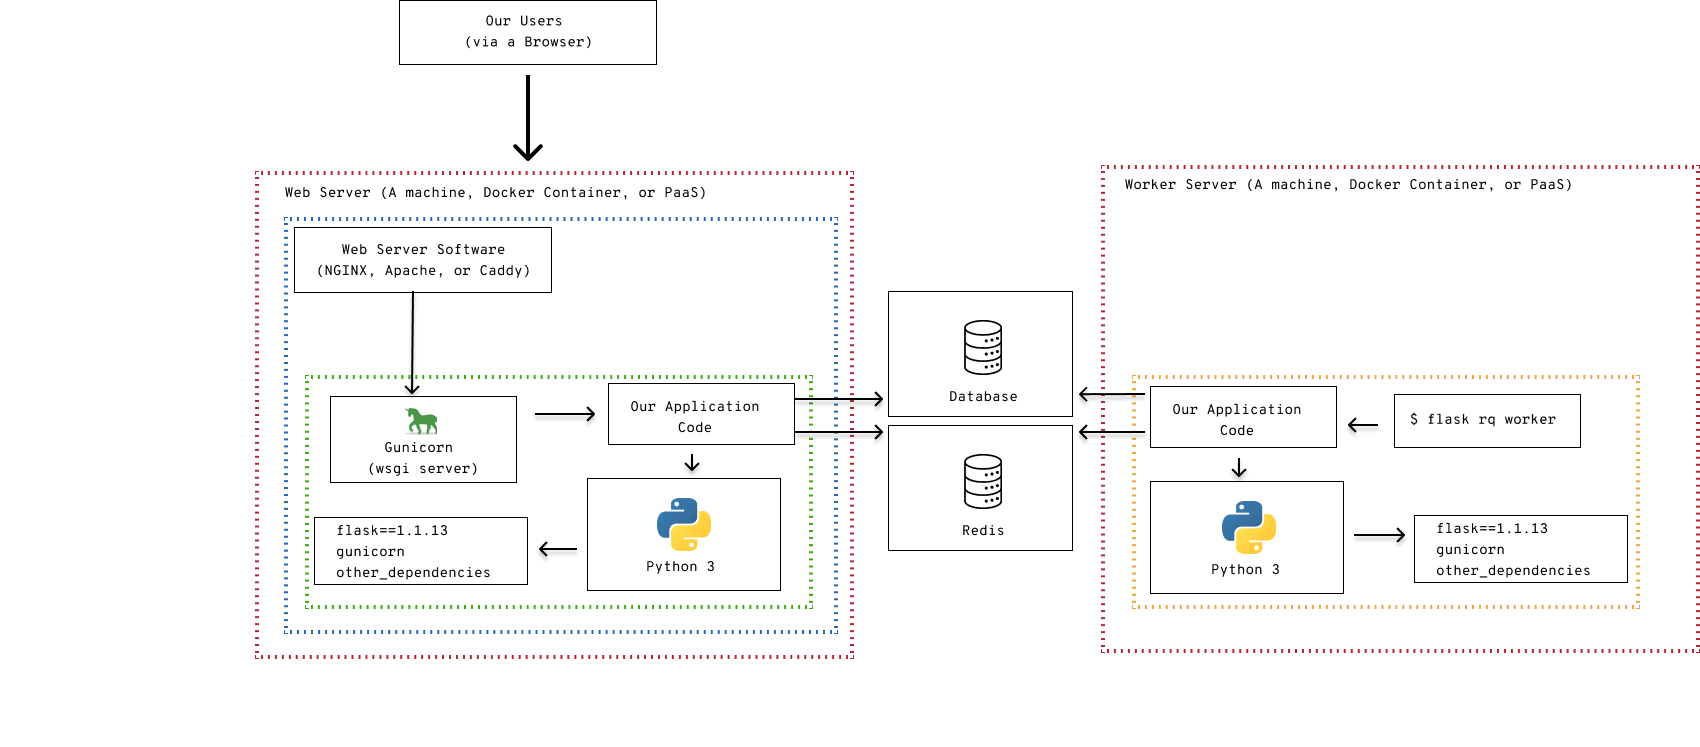
We will need to configure each of these pieces in order to get our application up and running.
Which setup should I use?
When you are starting off, the best choice is to choose an infrastructure design that will require the least mental overhead and will allow you to focus on your application. For most developers, the choice when you are starting off would be to platform as a service provider.
If you're a new developer and haven't had much infrastructure experience, you are certainly better off using a PaaS (platform as a service) provider like Heroku. Platforms like Heroku make it easy to setup servers, databases, and scale up your application. You will not need to worry as much about how to deploy new versions or if the underlying servers go down. The free plans are often enough to test your applications and run lightweight applications. When you are ready, you can pay for more resources as you go to improve performance.
If you are working on a much larger project, you may find that Heroku is not as economical if your application needs a lot of resources or is performance sensitive. In that case, you should look at manually configuring servers. If you do that, you will need to manage the servers, the configuration, and how you will have to think about getting new versions of the code updated on the servers.
Heroku
Setup
Create an account on Heroku and download the Heroku CLI if you haven't already done that.
To install the Heroku command line interface, you can go to the download page available at https://devcenter.heroku.com/articles/heroku-cli and walk through the installer for your operating system.
You will also need to have "git", a version tracking software tool, installed. In Ubuntu (or Ubuntu under Windows Subsytem for Link) you can install it with sudo apt-get install git. On a Mac, you can use homebrew to install git by running brew install git in your terminal.
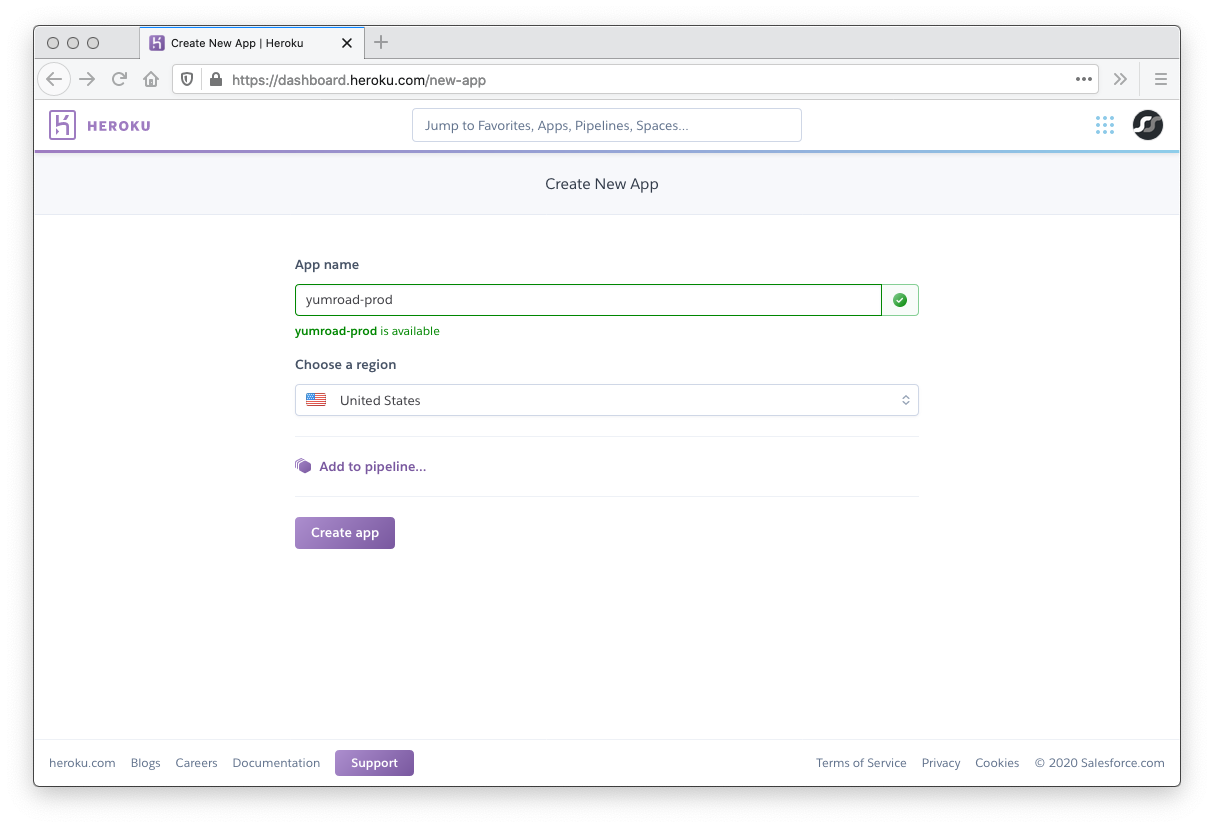
Our first step is to create an application on Heroku and set up our folder to point to that app. In your Heroku dashboard, create a new application and specify a name. In our example, we'll use yumroad-prod, but you can use any available name.
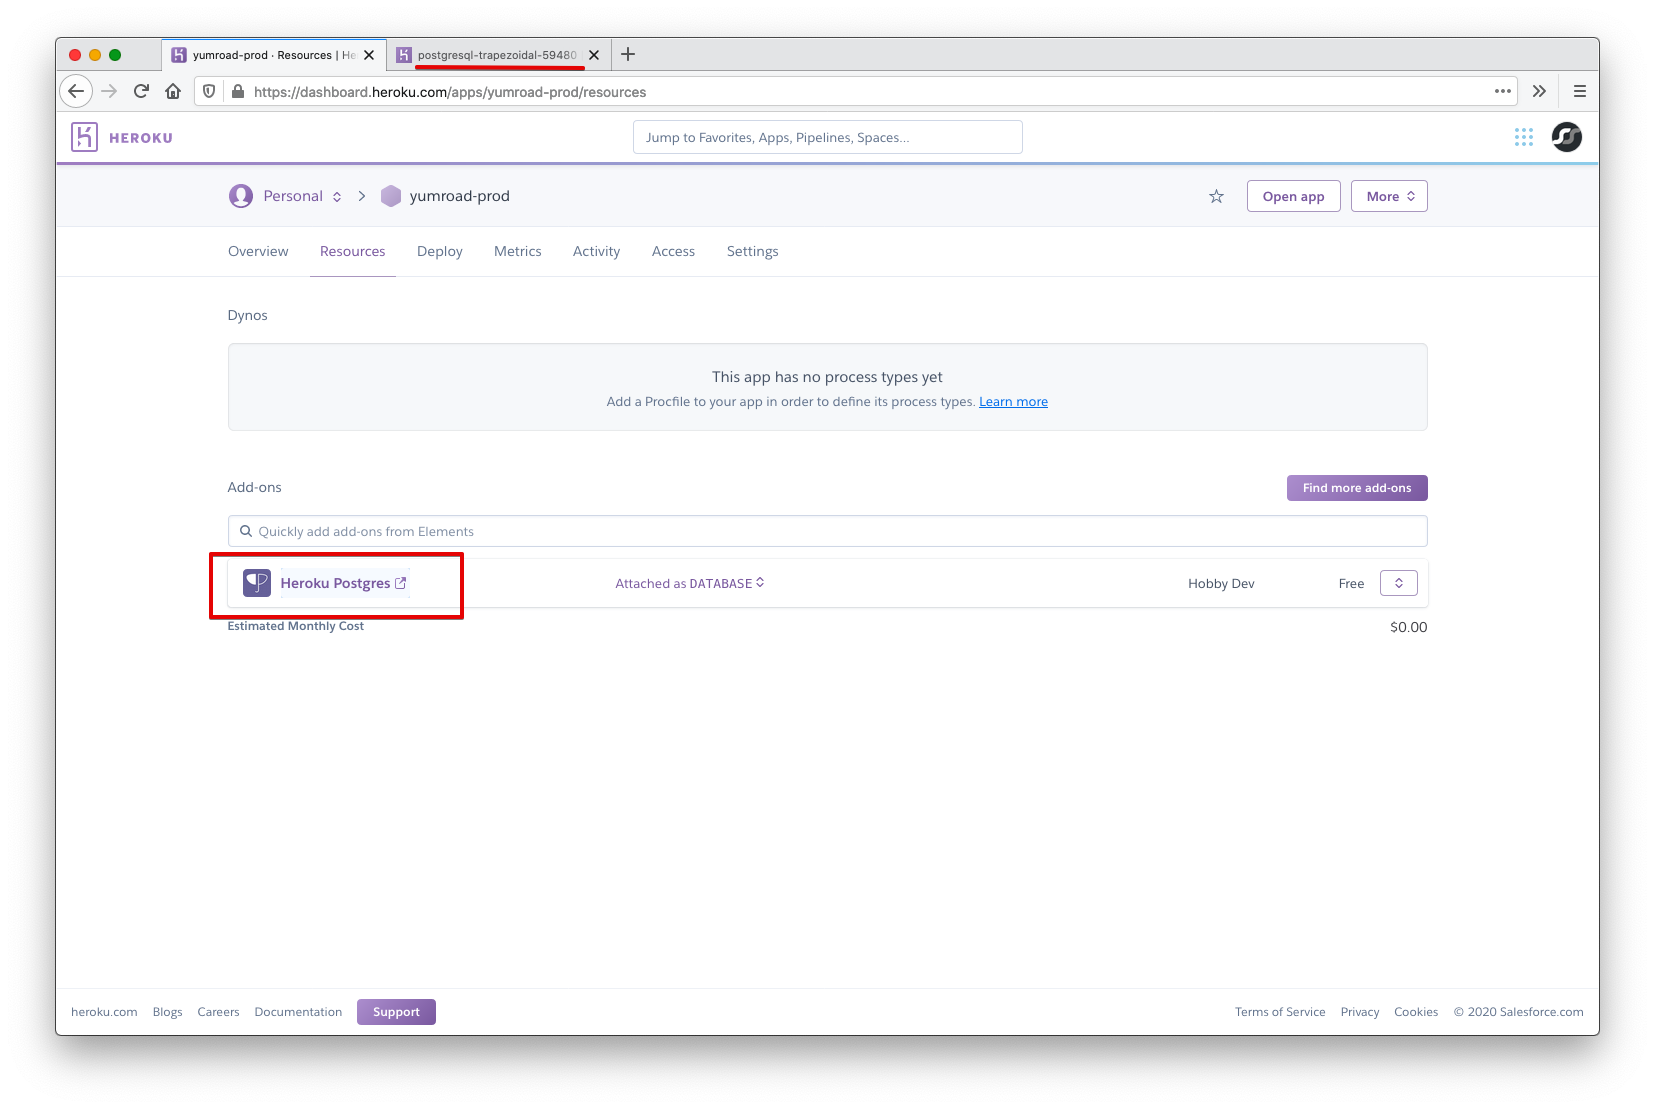
Now that we have an application, we'll also want to configure some of the other infrastructure pieces like our database and Redis cache. In the resources tab of the Heroku dashboard for our application, find the add ons section and add the "Heroku Postgres" add on. You can use the free hobby plan for now.
Why Postgres? It's a personal preference. Any good relational database supported by SQLAlchemy like MySQL will work.
Once you have installed Heroku Postgres, you can tweak settings and view credentials if you need them on the datastore dasbhoard, which you can access through the resources tab.
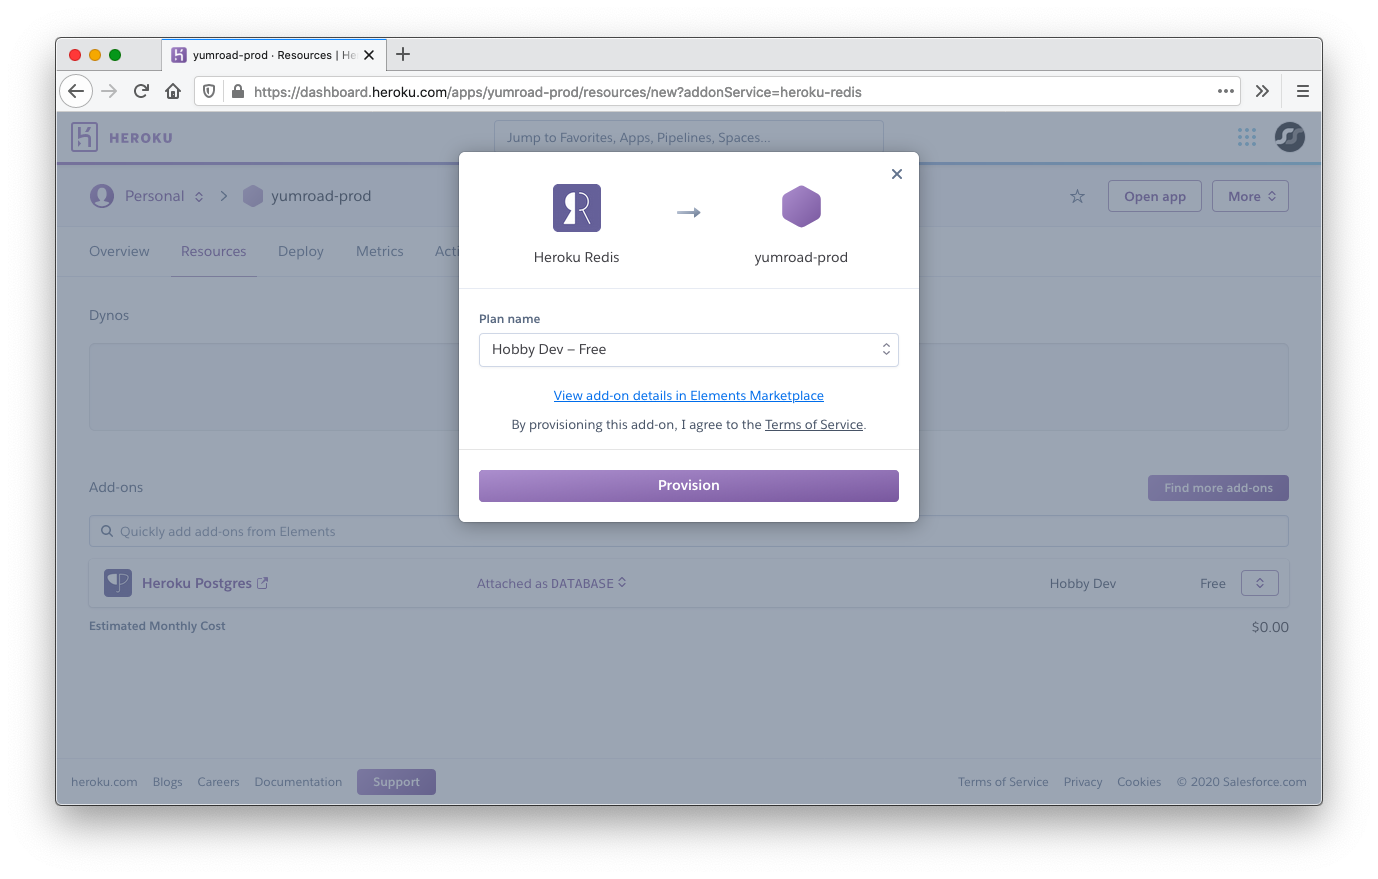
Next we'll repeat the process for Redis by installing "Heroku Redis"
Everything we've done on the Heroku dasbhoard to date is possible to do through the CLI as well.
Next up we'll want to configure the secrets for our production environment (the ones specified in yumroad/config.py). At this point, our configuration file should look like this:
import os

folder_path = os.path.abspath(os.path.dirname(__file__))

class BaseConfig:
    TESTING = False
    SQLALCHEMY_TRACK_MODIFICATIONS = False
    SECRET_KEY = os.getenv('YUMROAD_SECRET_KEY')
    SQLALCHEMY_DATABASE_URI = os.getenv('DATABASE_URL')

    MAIL_SERVER = os.getenv('MAIL_SERVER', 'smtp.mailgun.org')
    MAIL_PORT = os.getenv('MAIL_SERVER_PORT', 2525)
    MAIL_USERNAME = os.getenv('MAIL_USERNAME')
    MAIL_USE_TLS = os.getenv('MAIL_USE_TLS', True)
    MAIL_PASSWORD = os.getenv('MAIL_PASSWORD')
    SENTRY_DSN = os.getenv('SENTRY_DSN')

    STRIPE_SECRET_KEY = os.getenv('STRIPE_SECRET_KEY', 'sk_test_k1')
    STRIPE_PUBLISHABLE_KEY = os.getenv('STRIPE_PUBLISHABLE_KEY', 'sk_test_k1')
    STRIPE_WEBHOOK_KEY = os.getenv('STRIPE_WEBHOOK_KEY', 'sk_test_k1')
    REDIS_URL = os.getenv('REDIS_URL', 'redis://localhost:6379/0')
    RQ_REDIS_URL = REDIS_URL
    RQ_DASHBOARD_REDIS_URL =  RQ_REDIS_URL


class DevConfig(BaseConfig):
    SQLALCHEMY_DATABASE_URI = 'sqlite:///{}'.format(os.path.join(folder_path, 'dev.db'))
    SECRET_KEY = os.getenv('YUMROAD_SECRET_KEY', '00000abcdef')
    SQLALCHEMY_ECHO = True
    # Don't do anything fancy with the assets pipeline (faster + easier to debug)
    ASSETS_DEBUG = True
    RQ_REDIS_URL = REDIS_URL = os.getenv('REDIS_URL', 'redis://localhost:6379/0')
    CACHE_TYPE = 'simple'
    DEBUG_TB_INTERCEPT_REDIRECTS = False


class TestConfig(BaseConfig):
    TESTING = True
    SQLALCHEMY_DATABASE_URI = 'sqlite:///{}'.format(os.path.join(folder_path, 'test.db'))
    SECRET_KEY = os.getenv('YUMROAD_SECRET_KEY', '12345abcdef')
    WTF_CSRF_ENABLED = False
    STRIPE_WEBHOOK_KEY = 'whsec_test_secret'
    ASSETS_DEBUG = True
    # Run jobs instantly, without needing to spin up a worker
    RQ_ASYNC = False
    RQ_CONNECTION_CLASS = 'fakeredis.FakeStrictRedis'
    DEBUG_TB_ENABLED = False
    CACHE_TYPE = 'null'
    CACHE_NO_NULL_WARNING = True

class ProdConfig(BaseConfig):
    DEBUG = False
    SESSION_PROTECTION = "strong"
    # You should be using HTTPS in production anyway, but if you are not, turn
    # these two off
    SESSION_COOKIE_SECURE = True
    REMEMBER_COOKIE_SECURE = True
    ASSETS_DEBUG = False
    RQ_REDIS_URL = REDIS_URL = os.getenv('REDIS_URL')
    RQ_ASYNC = (REDIS_URL is not None)
    CACHE_TYPE = 'redis'
    CACHE_KEY_PREFIX = 'yumroad-'

configurations = {
    'dev': DevConfig,
    'test': TestConfig,
    'prod': ProdConfig,
}
Our production environment in config.py, will looking for a few things: YUMROAD_SECRET_KEY, DATABASE_URL, MAIL_USERNAME, MAIL_PASSWORD, SENTRY_DSN, STRIPE_SECRET_KEY, STRIPE_PUBLISHABLE_KEY, STRIPE_WEBHOOK_KEY, REDIS_URL.
To set config variables, go to the settings tab of your application on the Heroku dashboard and click on "Reveal Config Vars".
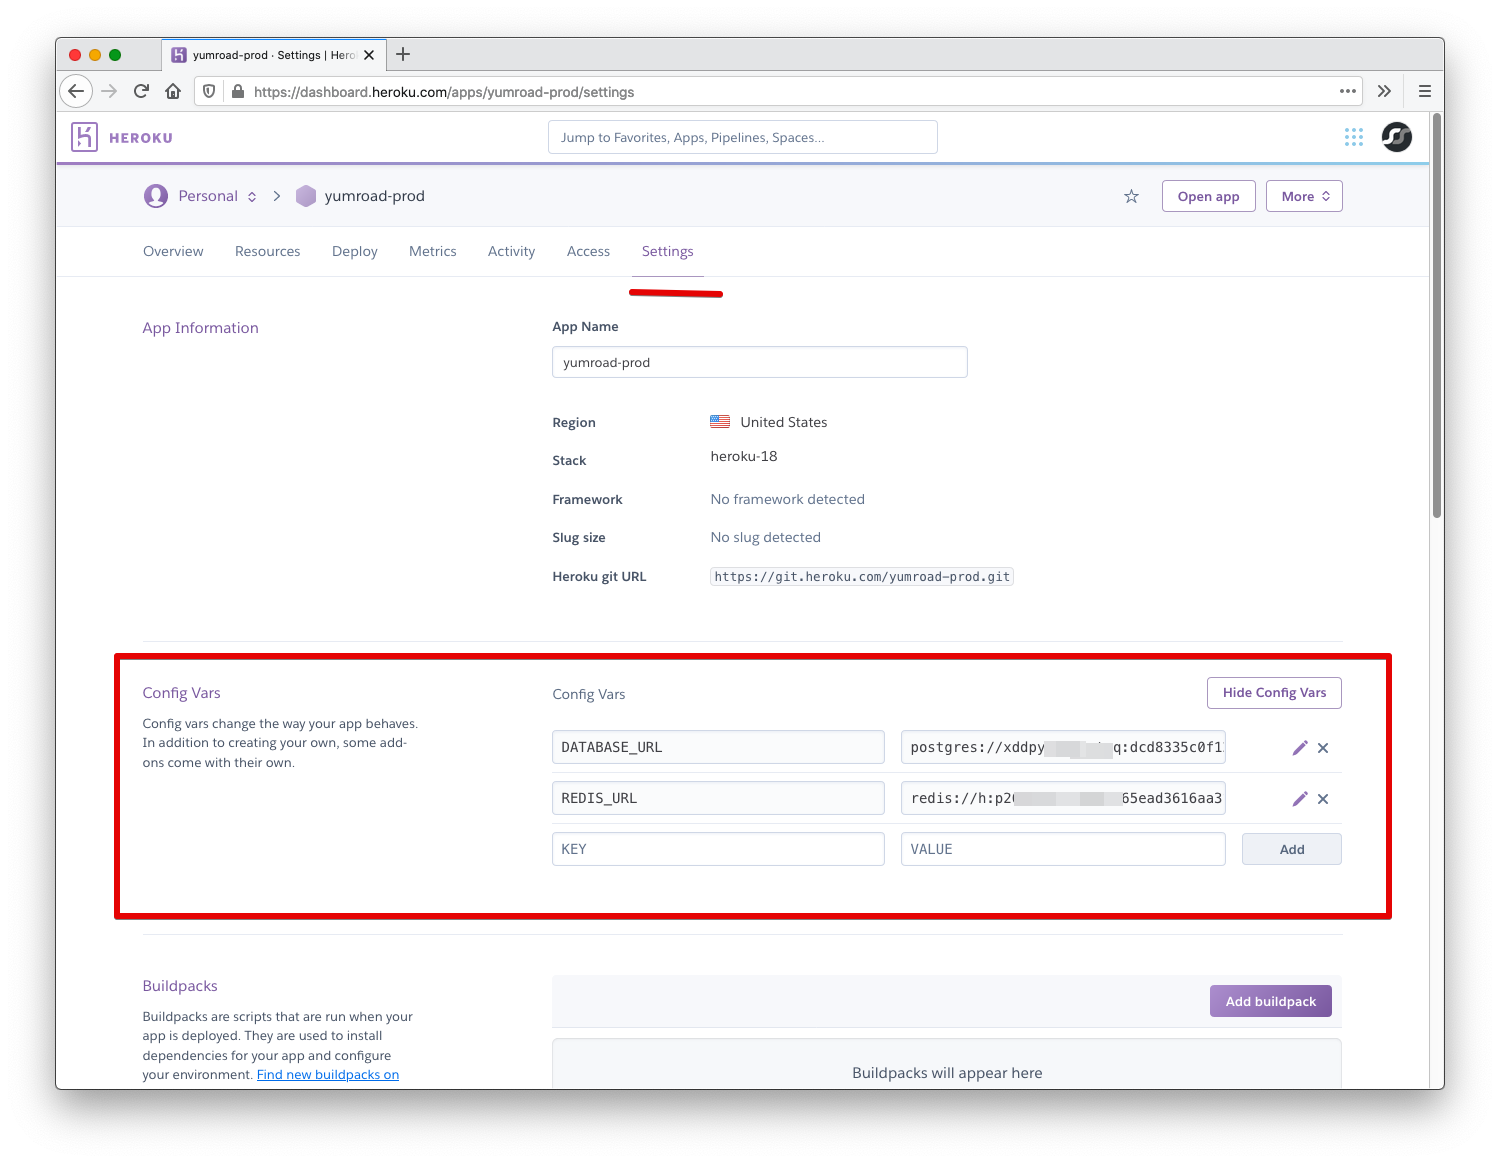
You will see that two config variables have already been set. The add ons we installed earlier each set up one config variable that provides the connection URL for their respective service. These environment variables already properly map to the environment variables we had BaseConfig lookup up (DATABASE_URL and REDIS_URL).
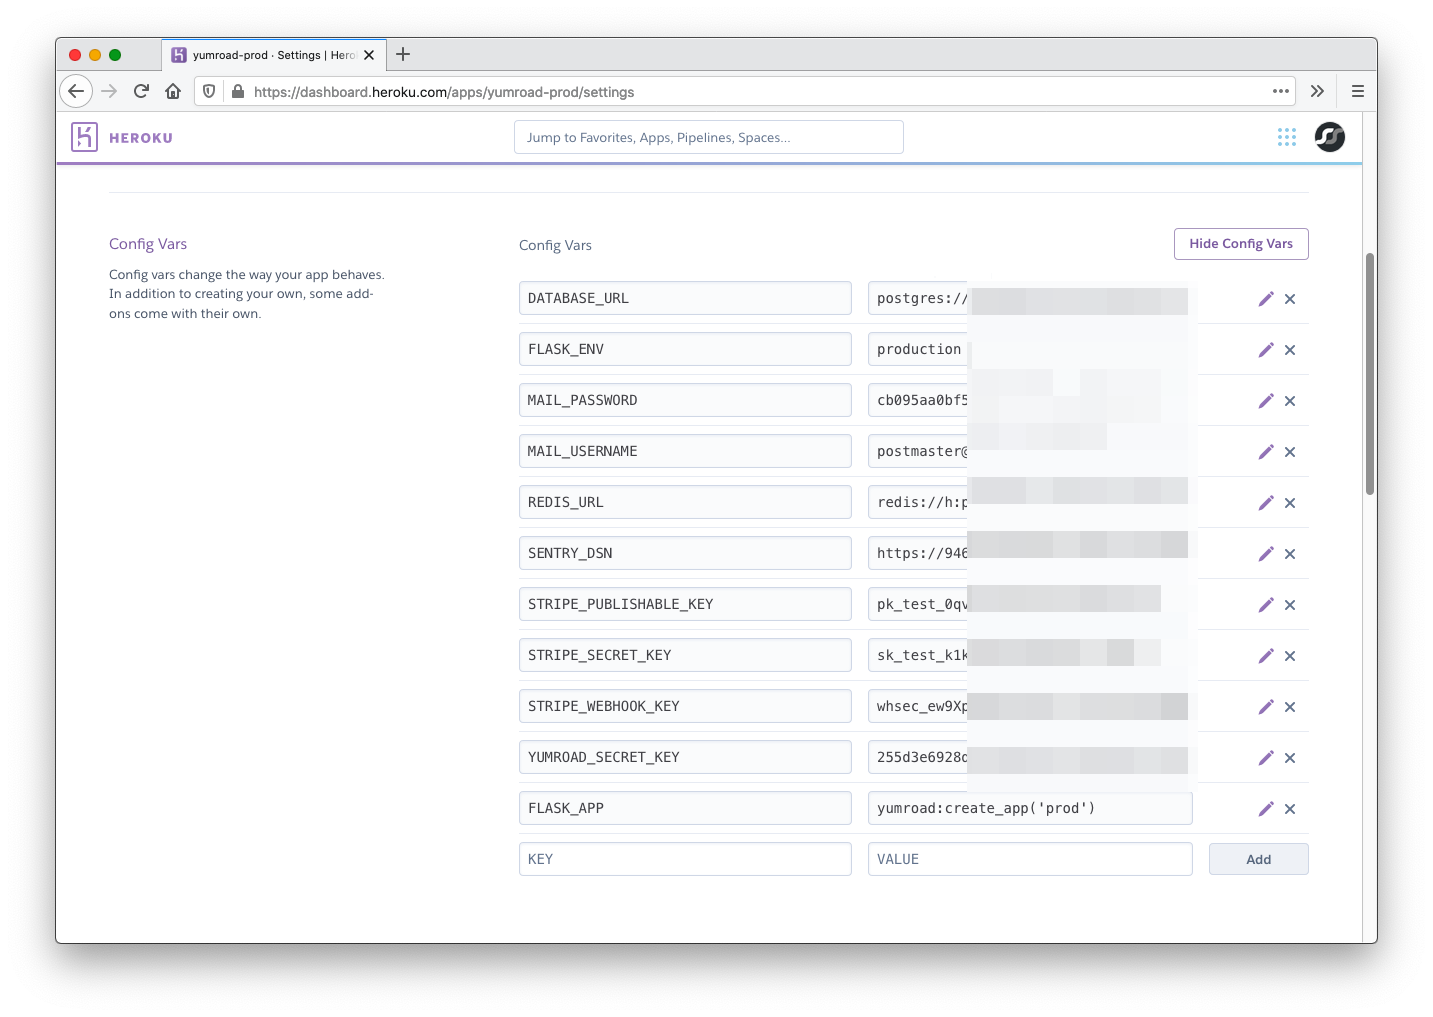
For the other secrets, we'll want to set those on the Heroku dashboard. For the application SECRET_KEY. which is set by the YUMROAD_SECRET_KEY environment variable, we should generate a new random value for production. We can use Python to generate a random string by running the following command in our terminal: python -c "import os; print(os.urandom(24).hex())" and using that value for YUMROAD_SECRET_KEY
In addition, you will also want to set FLASK_APP to yumroad:create_app('prod') and FLASK_ENV to production.
Deployment
Now that the base infrastructure is set up, we'll have to tell Heroku how to run our code. Heroku works best with Git to track new versions of the application to deploy. This form of deployment makes it easy to track changes between deploys, revert versions quickly, and deploy from anywhere with a single command. It is a good idea to start projects off by creating a Git repository from the beginning so you can always keep track of changes.
First, we'll need to setup a git project within our application. Within the root folder of our application (the folder that requirements.txt and the yumroad folder is located in), we will run git init to set up a new git project just for this folder.
$ cd our-project
$ ls
env requirements.txt tests conftest migrations seed.py yumroad
$ git init
Initialized empty Git repository in /home/our-project/.git/
Once we have the repository set up, we will set up a "remote" where we can eventually "push" our heroku application to by running the following command.
This page is a preview of Fullstack Flask: Build a Complete SaaS App with Flask